Tag: bbq tips

  • 5 Offset Smoker Mistakes I Had to Learn the Hard Way

    5 Offset Smoker Mistakes I Had to Learn the Hard Way

    1. I Added Wood When My Coal Bed Was Too Weak

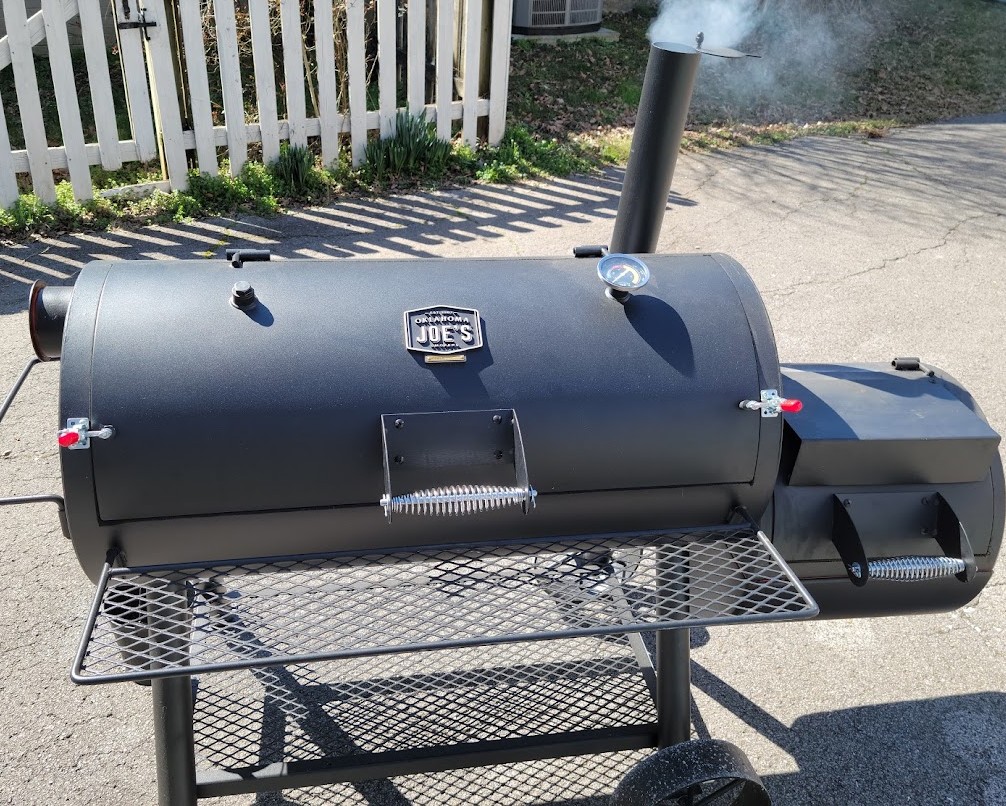
    One of the easiest mistakes I made while learning The Beast was waiting too long to add fuel.

    My fire usually starts with charcoal, and I’ve written more about the charcoal I use in my offset smoker and why it works for me. Over time I learned that the condition of that coal bed matters just as much as the temperature showing on the thermometer. Early on, I didn’t always recognize when the charcoal had weakened too far.

    The warning sign was usually pretty obvious once I knew what to look for: the charcoal had gone darker and wasn’t giving off the same strong heat it had earlier in the cook.

    Instead of strengthening the fire first, I made the mistake of adding more wood.

    I’ve done it with both chunks and splits. If the coal bed was too weak—or I added more wood than the existing fire could support—the new wood would smolder for a while but never really catch.

    Then the smoker temperature would start heading in the wrong direction. That kind of drop is only one reason pit temperatures can move around during a cook. I cover the others in my guide to why smoker temperatures fluctuate.

    My first move now is to give the fire more air. I open the vents and, if needed, open the firebox to help the existing coals respond. When the coal bed has faded too far to recover on its own, I light roughly half a chimney of fresh charcoal and add that once it is burning well.

    On The Beast, that kind of recovery has cost me another 15 to 30 minutes before the fire settled back down.

    What I do differently now is try not to let the fire get that far behind in the first place.

    Before adding another split, I look at the coal bed as well as the pit temperature. If the charcoal still looks hot and active, I know I have a much better chance of getting the next piece of wood burning cleanly. I normally use Jealous Devil briquettes for my charcoal base.

    That was one of the first lessons that made fire management feel less like reacting to problems and more like staying ahead of them.

    2. I Panicked When I Saw Thick White Smoke

    The first time I saw thick white smoke rolling out of The Beast, I assumed something had gone wrong.

    My reaction was to start messing with the fire immediately.

    I opened the firebox, stirred the fuel around, adjusted things, and generally made more changes than I probably needed to. At the time, I thought I was fixing the problem. What I eventually learned was that fresh wood sometimes needs a little time to heat up and catch.

    That does not mean I ignore heavy smoke no matter what. The difference is whether the fire is moving in the right direction.

    If I add a piece of wood and the smoke starts thinning as the wood catches, I usually give it time. If the wood keeps smoldering, the coal bed looks weak, and the pit temperature continues falling, then I know I have a real fire-management problem.

    That was a big change for me.

    Early on, I treated every burst of white smoke like an emergency. Now I try to read the whole fire before I start changing things.

    One of the easiest ways to make an offset smoker harder to manage is to adjust three or four things at once. If I open a vent, stir the coals, move the wood, and open the firebox all within a couple of minutes, it becomes hard to know which change actually helped.

    Sometimes the better move is simply to watch the fire for a few minutes and let the new wood catch.

    The mistake was not seeing white smoke.

    The mistake was assuming that every bit of white smoke needed an immediate reaction.

    3. I Chased Every Temperature Swing

    When I first started learning The Beast, every temperature change felt like something I needed to fix.

    If the temperature started climbing too high, my first instinct was to close the dampers. If that didn’t bring it down fast enough, I would sometimes open the cook chamber for a bit to let heat escape.

    The problem was that I was reacting to the thermometer before I understood what the smoker was actually doing.

    An offset smoker is not going to sit on one exact number for hours at a time. The fire changes as charcoal burns down, wood catches, wind shifts, and meat absorbs heat. Once I understood that, I stopped treating every small rise or drop like an emergency.

    Now I look for a trend instead of one number. I go into that in more detail in my guide to why smoker temperatures fluctuate and what I watch before making an adjustment.

    If the temperature moves a little and then settles, I usually leave it alone. If it keeps climbing or falling, then I start thinking about what changed in the fire and what adjustment actually makes sense.

    That has helped me avoid making several changes at once.

    Closing dampers, opening the cook chamber, moving fuel, and adding more charcoal all affect the smoker differently. If I start doing all of them too quickly, I can end up creating a bigger swing than the one I was trying to fix.

    The biggest lesson was patience.

    I still make adjustments when I need to, but I try to give each change enough time to show me what it did before I make another one.

    4. I Treated the Cook Chamber Like It Had One Temperature

    One of the things I had to learn about The Beast was that the entire cook chamber does not behave exactly the same.

    Early on, I was more focused on the overall smoker temperature than on what was happening in different parts of the chamber. Over time, I started noticing that some areas naturally ran hotter while others cooked a little slower.

    Once I understood those hot and cool zones, I stopped treating them like a problem and started using them as part of the cook.

    If I wanted a little more heat on something, I could place it in a hotter area. If I wanted a slower cook, I could use one of the cooler zones instead.

    That became especially useful when I had more than one rack of ribs on the smoker.

    Rather than leave one rack sitting in the hotter zone for the entire cook while another stayed in the cooler area, I started rotating them during the cook. That helped me use the temperature differences more intentionally and gave each rack time in different parts of the chamber.

    The biggest lesson was that uneven heat does not automatically mean something is wrong with the smoker.

    With an offset, learning where your cooker runs hot and cool is part of learning how to use it.

    Once I figured that out, I started cooking with the zones instead of fighting them.

    5. I Let Firebox Rust Go Longer Than I Should Have

    One mistake that had nothing to do with fire management was waiting too long to deal with rust on the firebox.

    Over time, I started noticing rusty spots on The Beast, especially around the top, sides, and underneath the firebox. At first, some of it looked worse than it actually was, so I kept putting the job off.

    Once I finally sanded the affected areas, I realized most of the rust was fairly cosmetic and had not turned into deep corrosion.

    That was good news, but it also made me wish I had handled it sooner.

    I cleaned the firebox, sanded the rusty areas by hand with an 80-grit sanding sponge, wiped everything down again, and touched up the affected spots with high-heat paint. I used roughly two coats rather than repainting the entire firebox. I documented the whole job, including the before-and-after photos, in how I fixed rust and repainted my offset smoker firebox.

    The underside was the most awkward area to work on, and the finished job was not perfect. But it was effective, and The Beast looked a lot better when I was done.

    The lesson for me was simple: surface rust is easier to deal with before it has a chance to become something more serious.

    An offset smoker lives around heat, smoke, grease, and weather, so some maintenance comes with owning one. I would rather spend a little time sanding and touching up a few spots than ignore them until I have a much bigger repair on my hands.

    Final Thoughts

    Learning to run an offset smoker took me a while because most of the lessons did not come from reading a manual. They came from watching the fire, making mistakes, and figuring out what The Beast was trying to tell me.

    I added wood when the coal bed was too weak. I panicked over thick white smoke. I chased temperature swings. I treated the cook chamber like it had one even temperature. And I let a little firebox rust hang around longer than I should have.

    None of those mistakes ruined barbecue for me, but each one taught me something useful.

    The biggest change over time has been learning to react less and observe more. I pay closer attention to the coal bed, the way fresh wood catches, the direction the temperature is moving, and how different parts of the cook chamber behave.

    That has made cooking on an offset a lot less frustrating.

    If you are new to offset smokers, you will probably make a few mistakes of your own. That is part of learning the cooker. The important thing is figuring out what happened, making one adjustment at a time, and remembering what worked the next time you fire it up.

    I am still learning The Beast too.

    That is part of what keeps it interesting.
  • Easy Smoked Spare Ribs on an Offset Smoker (And Why I Don’t Follow 3-2-1 Exactly)

    Easy Smoked Spare Ribs on an Offset Smoker (And Why I Don’t Follow 3-2-1 Exactly)

    Spare ribs are one of my favorite cooks on an offset smoker. Over the years I’ve probably cooked them 30 or 40 times, and if there’s one thing I’ve learned, it’s that the 3-2-1 method is a guideline—not a law. At 250°F–275°F, blindly following the clock can leave you with overcooked ribs. Here’s the approach I actually use on The Beast.

    Ingredients

    1 rack St. Louis-style spare ribs

    Yellow mustard (binder)

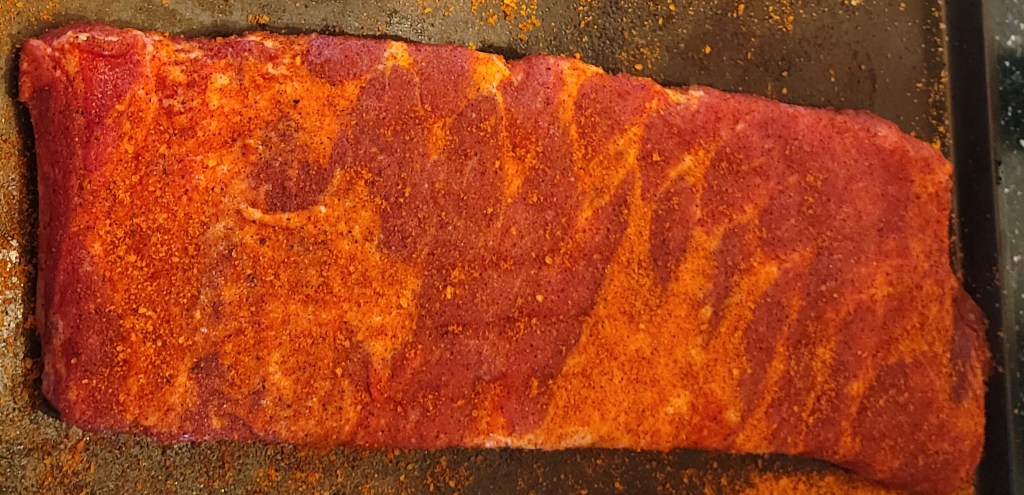
    BBQ rub of choice

    Water (for spritzing)

    Squeeze butter

    Honey (optional)

    BBQ sauce (optional)

    A Few Rubs I Use Regularly

    Kinder’s Black Cherry Chipotle – sweet with a touch of heat

    Heath Riles Honey Rub – Sweet

    Killer Hogs The BBQ Rub – More on the sweet side as well

    Most of the time I lean toward sweeter rib rubs with a little heat. Over the years I’ve made my own rubs and tried dozens of commercial options, but these are three that regularly find their way back onto my ribs.

    Smoker Setup

    For spare ribs on The Beast, I typically run between 250°F and 275°F.

    Fuel setup:

    • Charcoal base (lump or briquettes)
    • Wood splits for steady heat
    • Hickory or pecan work well
    • Cherry and peach are excellent options if you want a slightly sweeter smoke profile

    I keep the ribs bone-side down throughout the cook and spritz with water about every 30 minutes to keep the surface from drying out.

    One thing that surprises people:

    My rib cooks usually finish in 4 to 4½ hours, not six.

    That’s one reason I don’t follow the traditional 3-2-1 method exactly.

    At the temperatures I cook, blindly following the clock can easily lead to overcooked ribs.

    I pay more attention to:

    • Color
    • Bark development
    • Meat pullback
    • The bend test

    The ribs determine the timeline—not the other way around.

    Step 1: Prep the Ribs

    If you’re starting with a full rack of spare ribs, trim them to St. Louis style if desired. Most of the time I buy them already trimmed.

    Remove the membrane from the back of the ribs.

    A simple trick:

    Use a sharp knife to get underneath one corner of the membrane, then grab it with a dry paper towel and pull.

    The paper towel gives you enough grip that the membrane usually comes off in one piece.

    Trust me—this gets easier. My first few rib cooks involved a lot more fighting with the membrane than actual cooking.

    Once the membrane is removed:

    • Lightly coat the ribs with yellow mustard
    • Apply a generous layer of your favorite BBQ rub
    • Let the ribs sit while the smoker comes up to temperature

    I generally prefer sweeter rib rubs with a little heat, but ribs are one of the easiest cuts to experiment with.

    Step 2: Smoke the Ribs

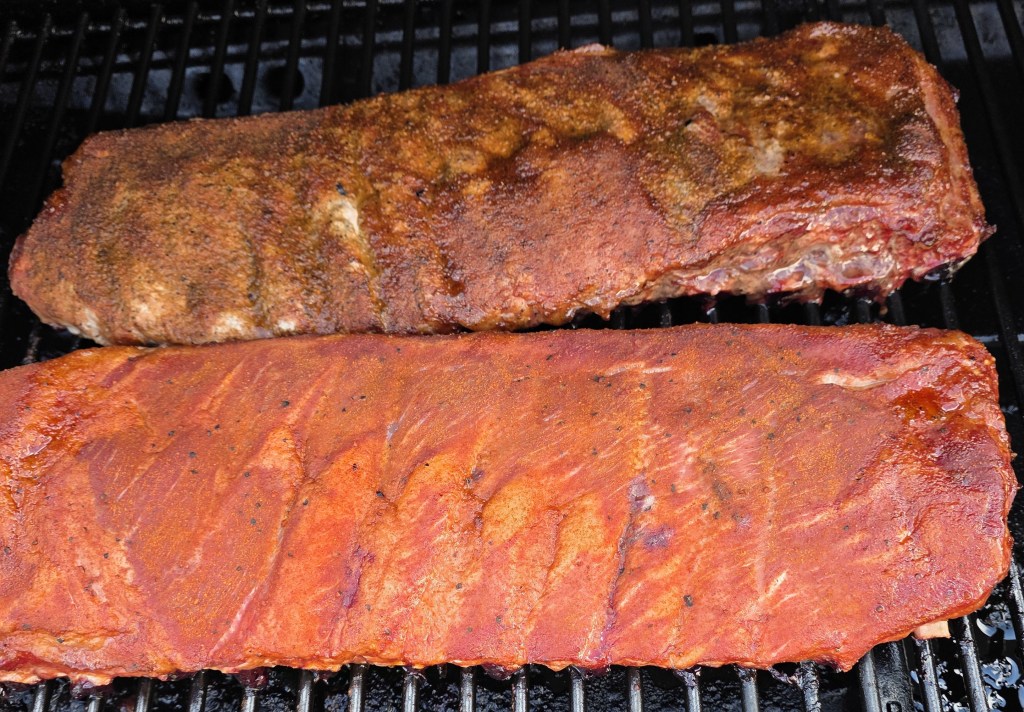
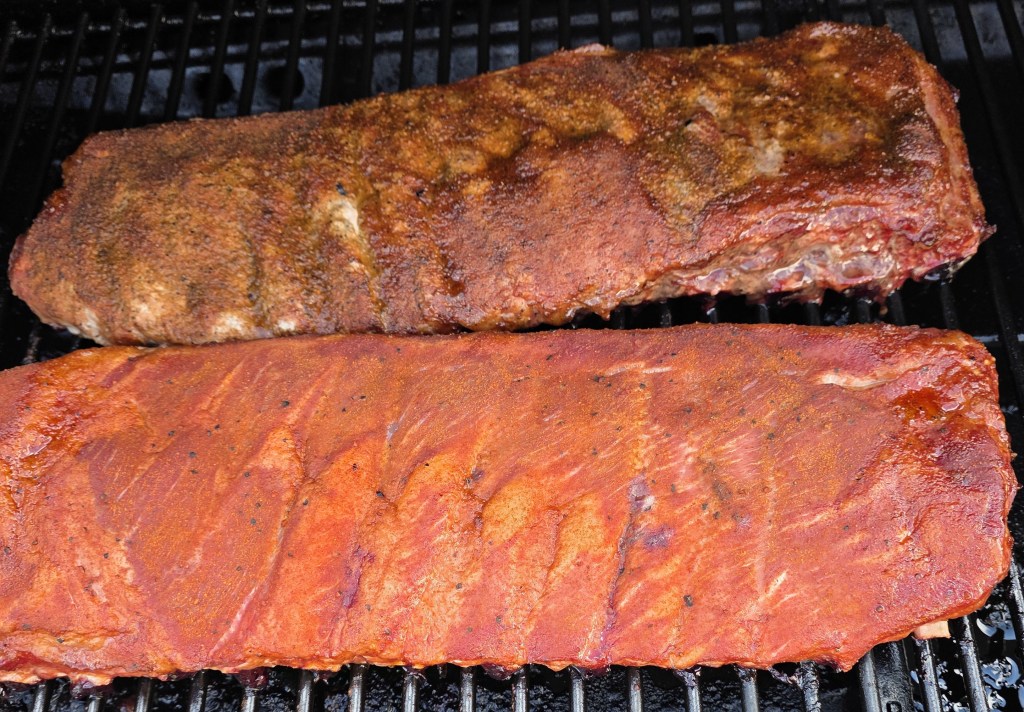
    Place the ribs on the smoker bone-side down and cook at 250°F–275°F.

    Throughout the cook, I spritz with water about every 30 minutes to help keep the surface from drying out.

    One thing I don’t do:

    I don’t wrap based strictly on time.

    A lot of rib recipes will tell you to wrap after exactly two or three hours. I pay more attention to what the ribs are telling me.

    I’m looking for:

    • Bark beginning to develop
    • A darker mahogany color
    • Good seasoning adhesion
    • The surface looking set

    For me, this usually happens around the two-hour mark, but every cook is different.

    When the color and bark look right, it’s time to wrap.

    Step 3: The Wrap

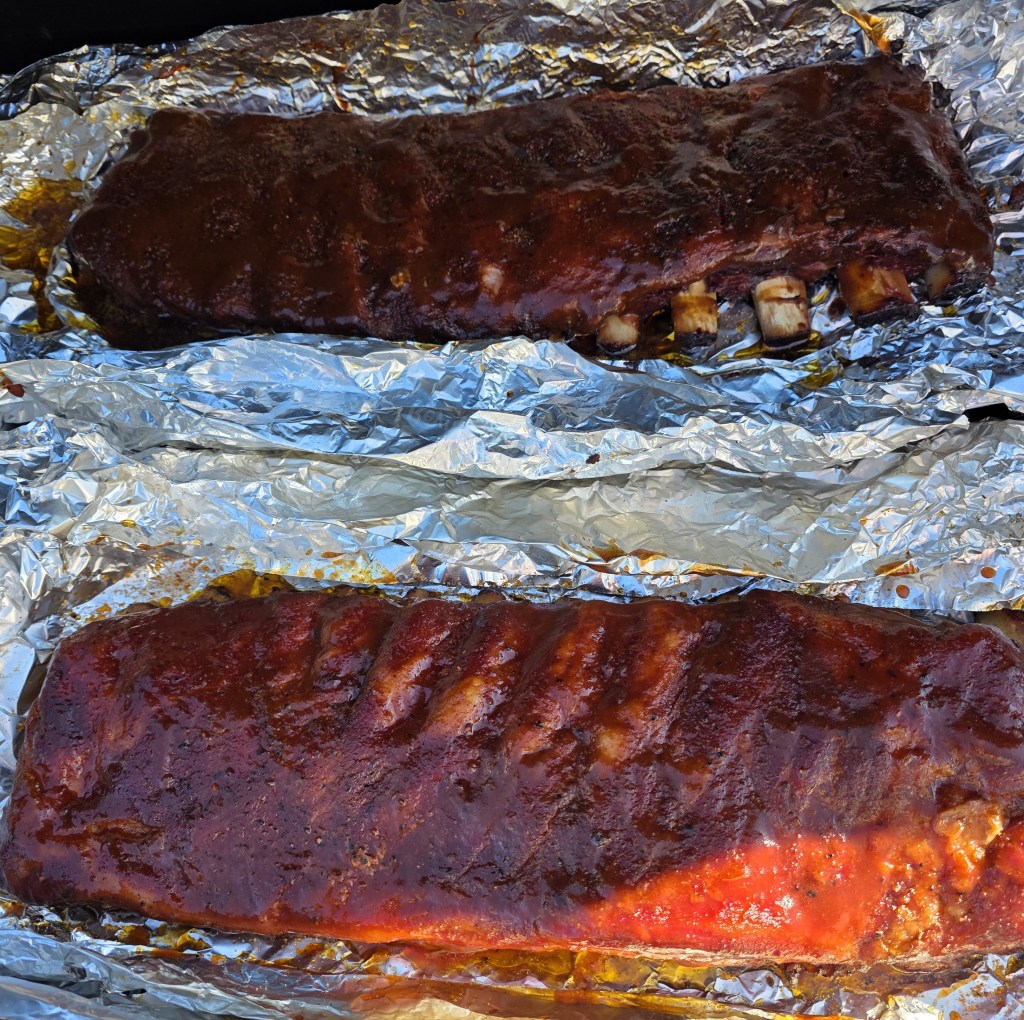
    Once the bark has developed and the color is where I want it, I wrap the ribs.

    For the wrap, I usually use either foil or butcher paper, depending on the cook.

    My process is simple:

    1. Squeeze a layer of butter onto the foil.
    2. Sprinkle a little of the same BBQ rub onto the butter.
    3. Place the ribs meat-side down on top.
    4. Add a light dusting of rub to the bone side.
    5. Wrap tightly and return to the smoker.

    If I want a sweeter finish, I’ll add a little honey before wrapping.

    You don’t really need to add anything to the bone side, but I like adding a little rub there. It helps with color and keeps the flavor consistent throughout the rack.

    Once wrapped, I place the ribs back on the smoker and continue cooking until they’re tender.

    Step 4: Knowing When the Ribs Are Done

    This is where I think a lot of beginners get into trouble.

    They watch the clock instead of the ribs.

    After the ribs have been wrapped for a while, I’ll carefully open the foil and take a look.

    The first thing I’m checking is meat pullback on the bones.

    If the meat has started shrinking back from the ends of the bones, that’s usually a good sign that they’re getting close.

    If I’m still not sure, I’ll use the bend test.

    Using a pair of tongs, I’ll pick up the rack from one end and let it hang.

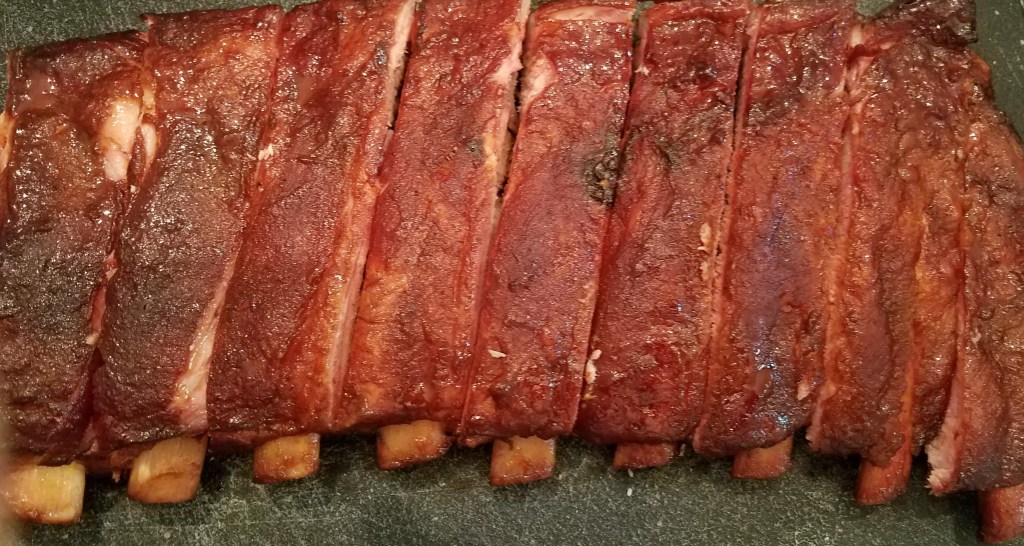
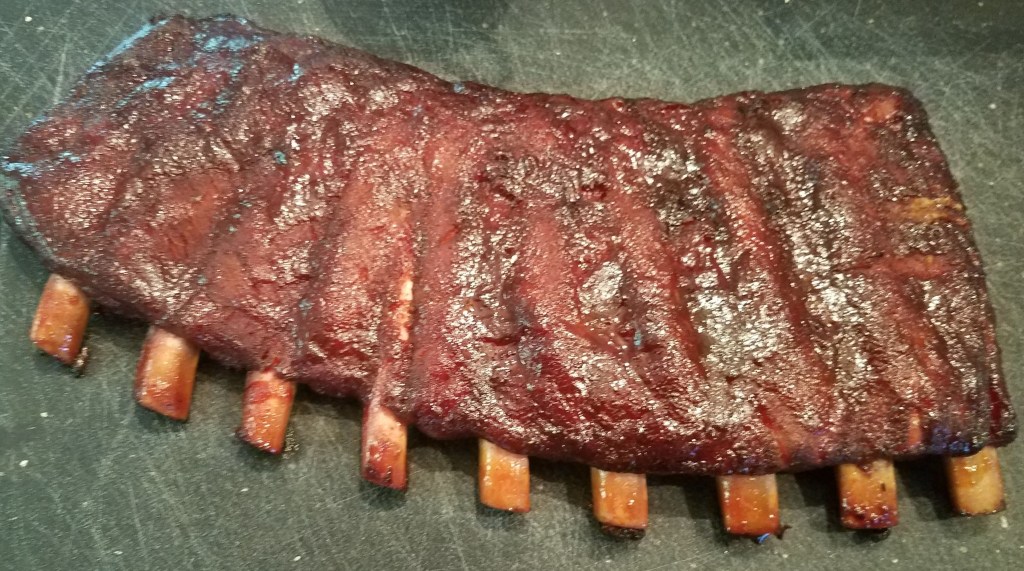
    If the rack bends easily and the meat begins to crack or pull apart slightly, they’re ready.

    If the rack still feels stiff, it goes back on the smoker.

    The clock doesn’t make this decision.

    The ribs do.

    Step 5: Finish the Ribs

    After the ribs pass the bend test, remove them from the wrap and place them back on the smoker.

    This final stage isn’t about cooking the ribs much longer.

    It’s about:

    • Setting the bark
    • Setting the sauce (if using sauce)
    • Letting the outside tighten up slightly

    If I’m making Memphis-style dry ribs, I may skip sauce entirely.

    If I’m using sauce, I’ll apply a light coat and let it set for about 30 minutes.

    This final stage is usually much shorter than many traditional rib recipes suggest.

    At this point, the ribs are already tender. I’m simply finishing them the way I like them.

    A Quick Note on BBQ Sauce

    One thing I’ve learned over the years is that ribs don’t always need sauce.

    If I’m making a Memphis-style dry rib, the bark and seasoning do most of the work.

    That said, there are plenty of times when I want a little sweetness or tang to finish the cook.

    A few sauces I’ve used repeatedly include:

    I usually apply sauce during the final 30 minutes of the cook. The goal isn’t to drown the ribs. I just want enough time for the sauce to set and become part of the bark.

    My Take on the 3-2-1 Method

    If you’ve spent any time researching smoked ribs, you’ve probably heard of the 3-2-1 method.

    The idea is simple:

    • 3 hours unwrapped
    • 2 hours wrapped
    • 1 hour unwrapped to finish

    For a lot of people, it’s their introduction to smoking ribs.

    The problem is that many beginners treat it like a rule instead of a guideline.

    At lower temperatures, the 3-2-1 method can work reasonably well. But when I’m cooking ribs at 250°F to 275°F, a strict 3-2-1 schedule can easily overcook them.

    That’s one reason I don’t follow it exactly.

    Most of my rib cooks end up looking more like:

    • About 2 hours unwrapped
    • Around 2 hours wrapped
    • About 30 minutes unwrapped to finish

    Sometimes even less.

    The biggest mistake beginners make isn’t undercooking ribs.

    It’s believing that every rack cooks on the same schedule.

    Ribs don’t care what the clock says.

    They care about heat, airflow, thickness, and how they’re cooking on that particular day.

    That’s why I pay more attention to:

    • Bark development
    • Color
    • Meat pullback
    • The bend test

    than I do to the timer.

    If the ribs aren’t ready, they stay on the smoker.

    If they’re ready early, I don’t keep cooking them just because a chart says I should.

    The ribs determine the schedule—not the other way around.

    Final Thoughts

    Spare ribs are one of my favorite things to cook on an offset smoker.

    They’re forgiving enough for beginners, but they still teach some of the most important lessons in BBQ:

    • Fire management
    • Patience
    • Smoke control
    • Learning when meat is actually done

    Over the years I’ve probably cooked ribs 30 or 40 times, and if there’s one thing I’ve learned, it’s that the best cooks happen when you stop obsessing over the clock and start paying attention to the food.

    That’s why I don’t follow the 3-2-1 method exactly.

    It’s a useful guideline, but every rack is different.

    Some finish sooner.

    Some take longer.

    The ribs determine the schedule.

    When the bark looks right, the color is where I want it, and the bend test tells me they’re ready, that’s when they come off the smoker.

    Some pitmasters prefer competition-style ribs with a clean bite.

    I don’t cook for judges.

    I cook for family and friends.

    My preference is ribs that are tender, flavorful, and easy to pull from the bone.

    At the end of the day, that’s the only scorecard that matters to me.