Category: Tips & Fixes

  • 5 Offset Smoker Mistakes I Had to Learn the Hard Way

    5 Offset Smoker Mistakes I Had to Learn the Hard Way

    1. I Added Wood When My Coal Bed Was Too Weak

    One of the easiest mistakes I made while learning The Beast was waiting too long to add fuel.

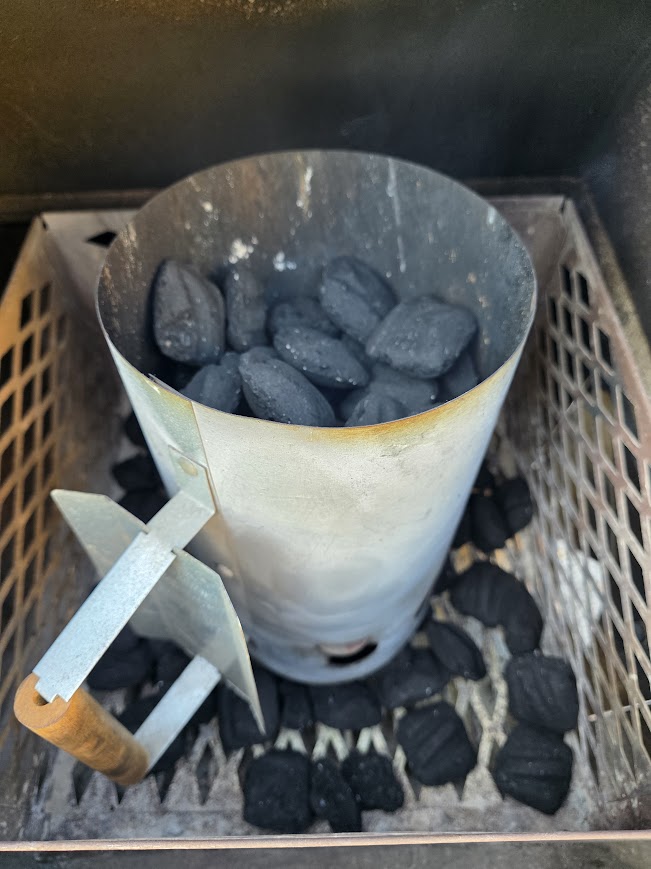
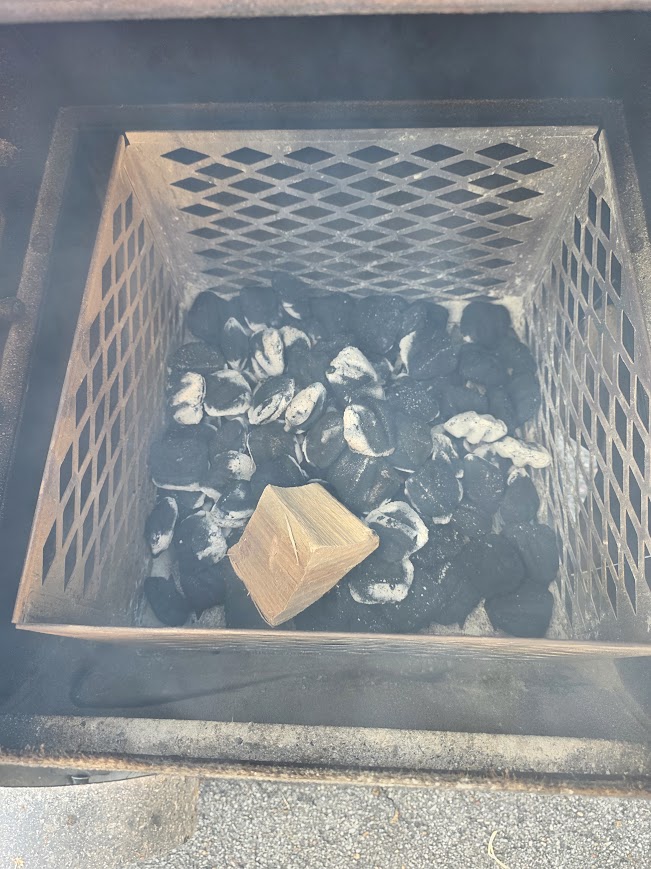
    My fire usually starts with charcoal, and I’ve written more about the charcoal I use in my offset smoker and why it works for me. Over time I learned that the condition of that coal bed matters just as much as the temperature showing on the thermometer. Early on, I didn’t always recognize when the charcoal had weakened too far.

    The warning sign was usually pretty obvious once I knew what to look for: the charcoal had gone darker and wasn’t giving off the same strong heat it had earlier in the cook.

    Instead of strengthening the fire first, I made the mistake of adding more wood.

    I’ve done it with both chunks and splits. If the coal bed was too weak—or I added more wood than the existing fire could support—the new wood would smolder for a while but never really catch.

    Then the smoker temperature would start heading in the wrong direction. That kind of drop is only one reason pit temperatures can move around during a cook. I cover the others in my guide to why smoker temperatures fluctuate.

    My first move now is to give the fire more air. I open the vents and, if needed, open the firebox to help the existing coals respond. When the coal bed has faded too far to recover on its own, I light roughly half a chimney of fresh charcoal and add that once it is burning well.

    On The Beast, that kind of recovery has cost me another 15 to 30 minutes before the fire settled back down.

    What I do differently now is try not to let the fire get that far behind in the first place.

    Before adding another split, I look at the coal bed as well as the pit temperature. If the charcoal still looks hot and active, I know I have a much better chance of getting the next piece of wood burning cleanly. I normally use Jealous Devil briquettes for my charcoal base.

    That was one of the first lessons that made fire management feel less like reacting to problems and more like staying ahead of them.

    2. I Panicked When I Saw Thick White Smoke

    The first time I saw thick white smoke rolling out of The Beast, I assumed something had gone wrong.

    My reaction was to start messing with the fire immediately.

    I opened the firebox, stirred the fuel around, adjusted things, and generally made more changes than I probably needed to. At the time, I thought I was fixing the problem. What I eventually learned was that fresh wood sometimes needs a little time to heat up and catch.

    That does not mean I ignore heavy smoke no matter what. The difference is whether the fire is moving in the right direction.

    If I add a piece of wood and the smoke starts thinning as the wood catches, I usually give it time. If the wood keeps smoldering, the coal bed looks weak, and the pit temperature continues falling, then I know I have a real fire-management problem.

    That was a big change for me.

    Early on, I treated every burst of white smoke like an emergency. Now I try to read the whole fire before I start changing things.

    One of the easiest ways to make an offset smoker harder to manage is to adjust three or four things at once. If I open a vent, stir the coals, move the wood, and open the firebox all within a couple of minutes, it becomes hard to know which change actually helped.

    Sometimes the better move is simply to watch the fire for a few minutes and let the new wood catch.

    The mistake was not seeing white smoke.

    The mistake was assuming that every bit of white smoke needed an immediate reaction.

    3. I Chased Every Temperature Swing

    When I first started learning The Beast, every temperature change felt like something I needed to fix.

    If the temperature started climbing too high, my first instinct was to close the dampers. If that didn’t bring it down fast enough, I would sometimes open the cook chamber for a bit to let heat escape.

    The problem was that I was reacting to the thermometer before I understood what the smoker was actually doing.

    An offset smoker is not going to sit on one exact number for hours at a time. The fire changes as charcoal burns down, wood catches, wind shifts, and meat absorbs heat. Once I understood that, I stopped treating every small rise or drop like an emergency.

    Now I look for a trend instead of one number. I go into that in more detail in my guide to why smoker temperatures fluctuate and what I watch before making an adjustment.

    If the temperature moves a little and then settles, I usually leave it alone. If it keeps climbing or falling, then I start thinking about what changed in the fire and what adjustment actually makes sense.

    That has helped me avoid making several changes at once.

    Closing dampers, opening the cook chamber, moving fuel, and adding more charcoal all affect the smoker differently. If I start doing all of them too quickly, I can end up creating a bigger swing than the one I was trying to fix.

    The biggest lesson was patience.

    I still make adjustments when I need to, but I try to give each change enough time to show me what it did before I make another one.

    4. I Treated the Cook Chamber Like It Had One Temperature

    One of the things I had to learn about The Beast was that the entire cook chamber does not behave exactly the same.

    Early on, I was more focused on the overall smoker temperature than on what was happening in different parts of the chamber. Over time, I started noticing that some areas naturally ran hotter while others cooked a little slower.

    Once I understood those hot and cool zones, I stopped treating them like a problem and started using them as part of the cook.

    If I wanted a little more heat on something, I could place it in a hotter area. If I wanted a slower cook, I could use one of the cooler zones instead.

    That became especially useful when I had more than one rack of ribs on the smoker.

    Rather than leave one rack sitting in the hotter zone for the entire cook while another stayed in the cooler area, I started rotating them during the cook. That helped me use the temperature differences more intentionally and gave each rack time in different parts of the chamber.

    The biggest lesson was that uneven heat does not automatically mean something is wrong with the smoker.

    With an offset, learning where your cooker runs hot and cool is part of learning how to use it.

    Once I figured that out, I started cooking with the zones instead of fighting them.

    5. I Let Firebox Rust Go Longer Than I Should Have

    One mistake that had nothing to do with fire management was waiting too long to deal with rust on the firebox.

    Over time, I started noticing rusty spots on The Beast, especially around the top, sides, and underneath the firebox. At first, some of it looked worse than it actually was, so I kept putting the job off.

    Once I finally sanded the affected areas, I realized most of the rust was fairly cosmetic and had not turned into deep corrosion.

    That was good news, but it also made me wish I had handled it sooner.

    I cleaned the firebox, sanded the rusty areas by hand with an 80-grit sanding sponge, wiped everything down again, and touched up the affected spots with high-heat paint. I used roughly two coats rather than repainting the entire firebox. I documented the whole job, including the before-and-after photos, in how I fixed rust and repainted my offset smoker firebox.

    The underside was the most awkward area to work on, and the finished job was not perfect. But it was effective, and The Beast looked a lot better when I was done.

    The lesson for me was simple: surface rust is easier to deal with before it has a chance to become something more serious.

    An offset smoker lives around heat, smoke, grease, and weather, so some maintenance comes with owning one. I would rather spend a little time sanding and touching up a few spots than ignore them until I have a much bigger repair on my hands.

    Final Thoughts

    Learning to run an offset smoker took me a while because most of the lessons did not come from reading a manual. They came from watching the fire, making mistakes, and figuring out what The Beast was trying to tell me.

    I added wood when the coal bed was too weak. I panicked over thick white smoke. I chased temperature swings. I treated the cook chamber like it had one even temperature. And I let a little firebox rust hang around longer than I should have.

    None of those mistakes ruined barbecue for me, but each one taught me something useful.

    The biggest change over time has been learning to react less and observe more. I pay closer attention to the coal bed, the way fresh wood catches, the direction the temperature is moving, and how different parts of the cook chamber behave.

    That has made cooking on an offset a lot less frustrating.

    If you are new to offset smokers, you will probably make a few mistakes of your own. That is part of learning the cooker. The important thing is figuring out what happened, making one adjustment at a time, and remembering what worked the next time you fire it up.

    I am still learning The Beast too.

    That is part of what keeps it interesting.

  • How I Fixed Rust and Repainted the Firebox on My Offset Smoker

    How I Fixed Rust and Repainted the Firebox on My Offset Smoker

    The firebox on an offset smoker takes a beating.

    Between high heat, weather, grease, and repeated cooks, it is one of the first places I expect to show wear. That same heat exposure is also one reason offset smokers can be tricky to manage, especially when you’re dealing with smoker temperature fluctuations. Recently, I started noticing several rusty areas on the firebox of my Oklahoma Joe Longhorn Reverse Flow, better known around here as The Beast.

    Some of the spots looked worse than others, especially around the top, sides, and underneath the firebox. At first, I was a little concerned that the rust might be getting serious.

    Once I started sanding, though, I found that most of it was more cosmetic than I expected.

    Rather than let it continue spreading, I decided to clean up the affected areas, sand away the surface rust, and touch them up with high-heat paint.

    This was not a full restoration. I did not strip or repaint the entire firebox. I simply worked on the areas that needed attention.

    Here is how I did it.

    Rust on firebox top and side before sanding.

    Why I Decided to Work on the Firebox

    My main reasons were appearance and rust prevention.

    The Beast still worked fine, but the rusty patches were becoming more noticeable. I use the firebox hard during regular cooks, usually with charcoal and wood, so the wear wasn’t exactly a surprise. I talk more about the charcoal I use in my offset smoker in another article. Some were on the top of the firebox, others were along the sides and bottom.

    The underside was probably the ugliest part because it is easy to overlook until you crouch down and actually look underneath.

    I would rather deal with a little surface rust now than ignore it and find out later that I should have taken care of it sooner.

    The Rust Wasn’t as Bad as It Looked

    Before I started, some of the rust looked pretty rough.

    Once I began sanding, I realized it was mostly surface-level and cosmetic. I was not dealing with major deterioration or deep corrosion.

    That was a relief.

    It also meant I did not need to turn this into a major restoration project. My goal was simply to remove the loose rust, smooth the affected areas, and give the exposed metal some protection again.

    Rust on top of firebox before sanding.

    What I Used

    I kept the project pretty simple.

    For sanding, I used a 3M Pro Grade Precision 80-grit sanding sponge.

    3M sandpaper sponges

    I did all of the sanding by hand. No drill attachment, wire wheel, or power sander.

    For paint, I used Rust-Oleum High Heat spray paint intended for grills and other high-temperature surfaces.

    Rustoleum High Heat spray paint

    The 80-grit sanding sponge ended up being a good choice for this job. It was aggressive enough to work through the surface rust without making the process unnecessarily complicated.

    I Cleaned the Firebox Before Sanding

    Before I started sanding, I wiped the firebox down.

    I wanted to get the surface cleaned up before working on the rust rather than grinding dirt and residue into the metal while sanding.

    Once the surface was ready, I started working the rusty areas by hand with the sanding sponge.

    Sanding the Rust Off by Hand

    I focused only on the affected areas rather than sanding the entire firebox.

    Some sections cleaned up fairly quickly.

    Others took more work, especially around hinges, edges, and curved areas where getting good contact with the sanding block was harder.

    The underside was the most awkward part of the whole job.

    Rust on the underneath of firebox before sanding

    Working underneath a smoker is not exactly a comfortable position, and getting the sanding sponge into the right spots took some patience.

    It did not come out perfect, but perfection was not really the goal.

    I wanted to remove the loose surface rust, smooth things out, and give the paint a better surface to stick to.

    For that, the 80-grit sponge worked well.

    Rust on firebox top during sanding

    Cleaning It Again Before Painting

    After sanding, I wiped the firebox down again.

    That second cleaning was important because sanding leaves behind dust and loose material that I did not want sitting underneath the new paint.

    Once everything looked clean, I moved on to painting the repaired sections.

    I Only Painted the Areas That Needed It

    I did not repaint the entire firebox.

    Instead, I concentrated on the areas where I had sanded away rust and exposed metal.

    I applied roughly two coats of high-heat paint to those spots.

    The weather was hot that day, and the paint dried quickly. I waited around 10 minutes between coats before applying the next one.

    Because this was a touch-up job rather than a full refinishing project, the goal was not to make the entire firebox look factory-new.

    I wanted the repaired areas covered and protected.

    Underneath of firebox during spray painting

    How It Turned Out

    The difference was immediately noticeable.

    The rusty patches were gone, the exposed areas were covered again, and the firebox looked much better overall.

    If you look closely, you can still tell that some areas were touched up. I was not trying to hide every mark or make The Beast look brand new.

    This smoker gets used.

    What mattered to me was stopping the visible rust from getting worse and improving the appearance while I was at it.

    For a simple afternoon maintenance project, I was happy with the result.

    Front of firebox during spray painting

    What I Learned

    The biggest surprise was that the rust was not nearly as bad as it initially looked.

    That alone made me glad I tackled it instead of assuming I had a much larger problem.

    I also learned that an 80-grit sanding sponge was plenty for the surface rust I was dealing with. I did not feel like I needed power tools for this particular job.

    The underside was definitely the most awkward section to reach, and I probably could have spent more time getting every little spot perfect.

    But this was maintenance, not a show-car restoration.

    The finished job is not perfect, but it is effective.

    I Haven’t Fired the Smoker Since Painting It

    One thing I cannot comment on yet is how the touch-up will hold up after another cook.

    I have not done a burn or cooked on The Beast since repainting the firebox.

    Once I have put some more heat cycles through it, I will have a better idea of how well the repaired areas hold up.

    If something changes, cracks, flakes, or needs another touch-up, I will update this article rather than pretending the job is finished forever.

    Underneath of firebox during spray painting

    Final Thoughts

    Surface rust on an offset-smoker firebox can look worse than it actually is.

    In my case, the rust on The Beast turned out to be mostly cosmetic. A little hand sanding, cleaning, and a couple coats of high-heat paint were enough to clean things up considerably.

    The whole project was straightforward, although crawling underneath the firebox was not exactly the highlight of my day.

    If I see these spots starting again in the future, I will probably deal with them sooner rather than waiting for them to become more noticeable.

    Offset smokers are built to work around heat, smoke, grease, and weather. That hands-on upkeep is part of the tradeoff with an offset, and I go into more of those differences in my comparison of pellet smokers and charcoal-and-wood smokers. A little maintenance comes with the territory.

    The Beast has plenty of cooks left in it. Sometimes it just needs a little attention between briskets.

    Top of firebox after spray painting

  • Best Charcoal for Offset Smokers: What I Actually Use

    Best Charcoal for Offset Smokers: What I Actually Use

    One of the biggest things that affects how an offset smoker runs is the charcoal you use.

    Some charcoal burns hot and clean. Some burns inconsistently, produces too much ash, or dies out faster than you expect. And when you’re trying to manage temperature on an offset smoker, those differences matter.

    I cook on an Oklahoma Joe Longhorn reverse flow offset smoker — better known around here as The Beast — and over time I’ve learned pretty quickly that not all charcoal performs the same.

    A good charcoal setup helps with:

    • Temperature stability
    • Fire management
    • Smoke quality
    • Burn time
    • Overall consistency during long cooks

    If you’re cooking on an offset smoker and trying to figure out what charcoal actually works best, here’s what I’ve found from real cooks on The Beast.

    What Makes a Good Charcoal for an Offset Smoker?

    Offset smokers demand more from charcoal than a standard grill.

    You’re not just trying to light a fire — you’re trying to maintain a steady, controlled burn over several hours while managing airflow and temperature at the same time.

    A good charcoal for an offset smoker should do a few things well:

    • Burn consistently – steady heat matters more than short bursts of high temperature
    • Produce less ash – excess ash can restrict airflow and affect the fire
    • Light cleanly – cleaner combustion helps avoid harsh smoke flavor
    • Hold heat well – especially during longer cooks like pork shoulder or brisket
    • Work well with wood chunks or splits – since many offset cooks combine charcoal and wood

    On The Beast, consistency matters more to me than chasing the absolute hottest burn possible. A steady fire is easier to control, easier to recover, and makes the entire cook smoother.

    That’s why the type of charcoal you use can make a bigger difference than people realize.

    And if your readings seem inconsistent during cooks, the issue may actually be that your smoker temperature doesn’t match the lid gauge.

    Lump Charcoal vs Briquettes for Offset Smokers

    When it comes to offset smokers, most people end up choosing between lump charcoal and briquettes.

    Both can work well — they just behave differently.


    Lump Charcoal

    Lump charcoal is made from real hardwood that’s been burned down into charcoal without being compressed into uniform shapes.

    What I like about lump charcoal on an offset smoker:

    • Burns hotter
    • Lights quickly
    • Produces less ash
    • Gives a more natural wood-fire feel

    The downside is consistency. Because the pieces vary in size, lump charcoal can burn unevenly at times and may require a little more attention during longer cooks.


    Briquettes

    Briquettes are compressed charcoal pieces designed to burn in a more uniform way.

    Advantages of briquettes:

    • More predictable burn
    • Easier temperature consistency
    • Longer steady burn times
    • Often easier for beginners to manage

    The trade-off is that briquettes usually produce more ash and don’t always burn as cleanly as good lump charcoal.


    What I Prefer on The Beast

    For my setup, I usually prefer a charcoal base that burns steadily and works well alongside wood chunks or splits.

    Consistency matters more to me than chasing maximum heat, especially when cooking in that 250–275°F range.

    That’s where a reliable charcoal setup really helps stabilize the cook.

    The Charcoal I’ve Had the Best Results With

    After a lot of cooks on The Beast, I’ve found that consistency matters more than chasing the “perfect” charcoal.

    What works best for me is a charcoal that:

    • Lights reliably
    • Holds steady temperatures
    • Doesn’t overload the firebox with ash
    • Recovers well after adding wood splits or opening the smoker

    For longer cooks, I tend to prefer charcoal that gives me a predictable burn and helps keep the smoker in that stable 250–275°F range without constant adjustments.

    A few brands have worked well for me over time:

    Kingsford Professional – steady and easy to manage

    Jealous Devil Lump Charcoal – hotter burn with less ash

    B&B Charcoal – good balance between burn time and heat consistency

    Different smokers react differently, but all three have given me solid results on an offset setup.

    The biggest thing is finding a charcoal that works consistently with your smoker and your cooking style — because once you learn how your fire behaves, managing temperature becomes a whole lot easier.

    Tips for Managing Charcoal on an Offset Smoker

    Even the best charcoal won’t help much if the fire isn’t managed properly.

    A few small habits can make a big difference when cooking on an offset smoker:


    Start with a Clean Fire

    A clean-burning fire produces better heat and cleaner smoke flavor.

    Avoid smothering the fire with too much fuel at once, and give new charcoal time to catch properly before making major adjustments.


    Add Fuel Gradually

    Large fuel dumps usually create temperature spikes.

    Smaller, more controlled additions help maintain a steadier cooking range.


    Watch Your Airflow

    Good airflow keeps charcoal burning efficiently.

    On an offset smoker, the intake vent controls how much oxygen reaches the fire, while the exhaust helps move heat and smoke through the cooker.

    Small adjustments usually work better than aggressive changes.


    Don’t Chase Every Temperature Change

    Minor swings are normal.

    Trying to constantly correct every small movement usually makes the problem worse.

    Staying within a reasonable range matters more than holding one exact number.


    Learn Your Smoker’s Rhythm

    Every offset smoker behaves a little differently.

    The more time you spend cooking on it, the easier it becomes to predict how your fire will respond when adding fuel, adjusting airflow, or changing weather conditions.

    That’s where confidence starts to build.

    If your temperatures are constantly moving around, it also helps to understand how to stabilize your smoker temperature.

    Final Thoughts: The Best Charcoal Is the One You Can Control Consistently

    There’s no single “perfect” charcoal for every offset smoker.

    What matters most is finding a fuel that burns consistently, works well with your setup, and helps you maintain control of the fire over long cooks.

    Some people prefer hotter-burning lump charcoal. Others like the predictability of briquettes. Both can produce great barbecue once you learn how your smoker responds.

    On The Beast, consistency has always mattered more to me than chasing extreme heat or constantly changing fuel types. A steady fire, controlled airflow, and manageable temperature range make the entire cook easier and more enjoyable.

    At the end of the day, the best charcoal is the one that helps you cook confidently and keeps your smoker running the way you want it to.

    And once you find that rhythm, everything else starts getting easier.

    As an Amazon Associate, I earn from qualifying purchases.

  • Why Your Smoker Temperature Keeps Fluctuating (And How to Fix It)

    Why Your Smoker Temperature Keeps Fluctuating (And How to Fix It)

    If you’ve spent any time cooking on a smoker, you’ve probably noticed one thing pretty quickly:

    The temperature doesn’t stay perfectly steady.

    One minute you’re sitting at 250°F, and the next you’re watching it climb or drop without really knowing why. For beginners especially, that can feel like something is going wrong.

    The truth is, some temperature fluctuation is completely normal — especially on charcoal and offset smokers.

    I cook on an Oklahoma Joe Longhorn reverse flow offset smoker (The Beast), and learning how to manage temperature swings was one of the first real challenges. It’s not about eliminating every fluctuation — it’s about understanding what’s causing it and how to keep things under control.

    If your smoker temperature keeps moving around, here’s what’s actually happening — and how to fix it.

    What Causes Temperature Swings in a Smoker?

    Temperature swings don’t happen randomly — they’re almost always tied to how your fire and airflow are behaving.

    On most smokers, especially charcoal and offset setups, heat isn’t controlled by a dial. It’s controlled by how fuel burns and how air moves through the cooker.

    A few common factors cause temperatures to rise and fall:

    • Fuel changes – adding charcoal or wood increases heat, while burning fuel down lowers it
    • Airflow adjustments – opening or closing vents changes how much oxygen feeds the fire
    • Fire quality – a clean, steady burn vs a struggling or uneven fire
    • Lid openings – every time you open the smoker, you lose heat and disrupt airflow
    • Weather conditions – wind and outside temperature can affect how your smoker holds heat

    All of these variables are constantly interacting, which is why temperatures move instead of staying perfectly flat.

    The key isn’t stopping every fluctuation — it’s learning how to manage these factors so the swings stay small and controlled.

    If you’re just getting started, it also helps to understand pellet grill vs charcoal for beginners.

    How Much Temperature Fluctuation Is Normal?

    One of the biggest misconceptions in BBQ is that your smoker temperature needs to stay perfectly steady.

    It doesn’t.

    In fact, small temperature swings are completely normal — especially on charcoal and offset smokers.

    A good rule of thumb:

    • ±10–15°F → very normal
    • ±20–25°F → still manageable
    • Large or constant swings → something needs attention

    On a live-fire setup like an offset smoker, you’re dealing with burning fuel, airflow, and heat movement all at once. That naturally creates some variation.

    On The Beast, I’m usually aiming to stay in a range rather than lock into one exact number. If I’m cooking in the 250–275°F zone, I’m not worried if it moves around within that window.

    The goal isn’t perfection — it’s consistency over time.

    As long as your smoker is staying within a reasonable range, those small fluctuations won’t hurt your cook.

    Common Reasons Your Smoker Temperature Keeps Fluctuating

    If your smoker temperature is swinging more than it should, there’s usually a specific reason behind it.

    Here are the most common causes:


    1. Adding Too Much Fuel at Once

    Dumping in a large amount of charcoal or throwing on multiple wood splits can spike your temperature quickly.

    Smaller, controlled additions help keep your heat steady.


    2. Poor Airflow Control

    Airflow is everything when it comes to fire.

    • Too much air → fire burns hotter and faster
    • Too little air → fire struggles and temperature drops

    Making small adjustments to your vents instead of big changes helps stabilize things.


    3. Inconsistent Fire Management

    Letting your fire burn down too far and then trying to bring it back up quickly leads to big swings.

    A steady fire requires steady attention — not constant adjustment, but consistent awareness.


    4. Opening the Lid Too Often

    Every time you open the smoker, heat escapes and airflow changes.

    That leads to temperature drops followed by spikes as the fire reacts.


    5. Weather and Wind

    Wind can push air into your firebox or pull heat out of your smoker.

    Cold weather can also make it harder to maintain steady temps.

    Even small environmental changes can have a noticeable impact.


    6. Poor Fuel Quality

    Low-quality charcoal or damp wood doesn’t burn cleanly or consistently.

    That leads to uneven heat and more fluctuation.

    If your fuel may be part of the problem, here’s what I’ve found works best when choosing the best charcoal for an offset smoker.


    Most of the time, it’s not just one of these — it’s a combination.

    The good news is, once you recognize what’s causing the swings, it becomes much easier to fix.

    How to Stabilize Your Smoker Temperature

    Once you understand what’s causing temperature swings, keeping things steady becomes a lot more manageable.

    Here are a few practical ways to stabilize your smoker:


    1. Make Small, Gradual Adjustments

    Whether you’re adjusting vents or adding fuel, small changes go a long way.

    Big adjustments tend to overcorrect and create larger swings. Give each change time to take effect before making another.


    2. Maintain a Steady Fire

    Don’t let your fire burn down too far before adding more fuel.

    Adding smaller amounts of charcoal or wood consistently helps keep your temperature stable instead of constantly chasing it.


    3. Control Your Airflow

    Use your intake vent as your primary control.

    • Open slightly to increase heat
    • Close slightly to reduce it

    Avoid constantly adjusting both intake and exhaust — that usually leads to more fluctuation.


    4. Limit How Often You Open the Smoker

    Every time you open the lid, you’re resetting the system.

    Try to trust your process and only check when necessary.


    5. Use a Reliable Thermometer

    Built-in gauges can be off.

    Using a digital thermometer gives you a more accurate reading and helps you make better adjustments.

    If your readings seem off, it could also be an issue with your thermometer—here’s why your smoker temperature doesn’t match the lid gauge.


    6. Protect Your Smoker from Wind

    If possible, position your smoker where it’s shielded from wind.

    Even a small barrier can make a noticeable difference in temperature stability.


    Stabilizing your smoker isn’t about eliminating every fluctuation — it’s about keeping things within a controlled range and letting the cook run smoothly.

    And if you’re comparing setups overall, I also broke down what pellet vs charcoal really costs over five years.

    Final Thoughts: Don’t Chase Perfect Temperature

    If there’s one thing to keep in mind, it’s this:

    You don’t need perfect temperature to cook great BBQ.

    Small fluctuations are part of the process, especially when you’re working with charcoal or an offset smoker. Trying to lock your smoker into one exact number usually leads to over-adjusting and bigger swings.

    It’s better to focus on staying within a consistent range and letting the cook develop over time.

    On The Beast, I’m not chasing a perfect 250°F — I’m watching how the fire behaves and keeping things in that 250–275°F zone. As long as it stays in that window, the results are there.

    The more time you spend with your smoker, the more natural this becomes.

    And once it clicks, those temperature swings stop feeling like a problem — and start feeling like part of the process.

  • Pellet vs Charcoal: Which One Tastes Better?

    Pellet vs Charcoal: Which One Tastes Better?

    When it comes to BBQ, taste is what really matters.

    You can talk about ease, cost, and convenience all day, but at the end of it, you’re trying to put something on the table that actually tastes like real barbecue.

    That’s where the debate between pellet grills and charcoal cooking gets a little more serious.

    Pellet grills are known for consistency and ease of use, while charcoal — especially when used in smokers like an offset — has a reputation for producing a deeper, more traditional smoke flavor.

    I cook on a charcoal and wood setup myself — an Oklahoma Joe Longhorn reverse flow offset smoker, better known as The Beast. So I’ve spent plenty of time managing fire, smoke, and airflow to get the kind of flavor people expect from BBQ.

    If you’re trying to decide which one actually tastes better, let’s break it down based on what you’ll notice on the plate — not just how the equipment works.

    What Actually Creates BBQ Flavor?

    Before comparing pellet grills and charcoal, it helps to understand what actually creates that classic BBQ flavor.

    It’s not just the grill or smoker itself — it’s the combination of fuel, smoke, heat, and time.

    A few things play the biggest role:

    • Type of fuel – wood, charcoal, or pellets all burn differently and produce different smoke profiles
    • Combustion quality – clean-burning fire vs thick, dirty smoke
    • Airflow – how oxygen feeds the fire and moves heat and smoke through the cooker
    • Cooking temperature – lower and slower cooks allow more smoke interaction
    • Time in the smoker – longer exposure builds deeper flavor

    When everything is working together, you get that balanced smoke flavor people expect — not overpowering, not bitter, just enough to enhance the meat.

    The difference between pellet and charcoal cooking really comes down to how each system handles these factors.

    Pellet Grills: A Lighter, More Controlled Smoke Flavor

    Pellet grills produce a clean, consistent smoke that’s easy to manage — and that shows up in the flavor.

    Because pellets are fed into a controlled fire pot and burned efficiently, the smoke tends to be lighter and more subtle. You’re getting real wood flavor, but it’s not as intense as what you’d typically get from charcoal and wood chunks or splits.

    For a lot of people, that’s actually a good thing.

    Pellet grills make it easier to avoid heavy or bitter smoke, especially for beginners who are still learning how fire behaves. The result is a more balanced flavor that doesn’t overpower the meat.

    From a taste perspective, that usually means:

    • Milder smoke flavor – noticeable, but not dominant
    • Cleaner finish – less risk of harsh or acrid taste
    • Consistent results – easier to repeat from cook to cook

    The trade-off is depth.

    If you’re looking for that heavier, traditional BBQ flavor — the kind you get from a live fire with charcoal and wood — pellet grills can feel a little lighter by comparison.

    But if you prefer a more subtle smoke profile, or you’re just starting out, pellet cooking delivers a flavor that’s approachable and reliable.

    Charcoal and Offset Smoking: Deeper, Traditional BBQ Flavor

    Charcoal and offset smoking produce a different kind of flavor — one that’s often described as more traditional or more “authentic” BBQ.

    Instead of a controlled system feeding fuel automatically, you’re working with a live fire. Charcoal provides the heat base, and wood chunks or splits add the smoke. How that fire burns — clean or dirty, steady or fluctuating — directly affects the taste.

    On an offset smoker like The Beast (an Oklahoma Joe Longhorn reverse flow), you can actually see and feel that process. The firebox, airflow, and fuel all work together, and small adjustments can change how the smoke interacts with the meat.

    When everything is dialed in, the result is:

    • Richer smoke flavor – deeper and more pronounced
    • More bark development – especially at slightly higher temps like 250–275°F
    • Distinct wood influence – depending on the type of wood you use

    But there’s a catch.

    That same live fire can also work against you if it’s not managed well. Thick, dirty smoke or poor airflow can lead to bitter or overpowering flavors — something beginners run into early on.

    When it’s done right, though, charcoal and offset cooking produces the kind of flavor most people associate with classic barbecue.

    If you’re dealing with unstable heat while cooking, here’s how to stabilize your smoker temperature

    Pellet vs Charcoal: Which One Actually Tastes Better?

    If you’re asking purely which one produces the strongest, most traditional BBQ flavor, charcoal and offset cooking usually comes out on top.

    The combination of charcoal heat and real wood burning in a live fire creates a deeper, more pronounced smoke profile. When it’s done right, it’s the flavor most people associate with classic barbecue.

    Pellet grills, on the other hand, produce a milder and more controlled smoke flavor. It’s clean, consistent, and easier to manage — but it doesn’t have quite the same intensity.

    That doesn’t mean it’s worse.

    For a lot of people, especially beginners, pellet cooking hits a sweet spot:

    • Enough smoke to enhance the meat
    • Less risk of overpowering flavor
    • More consistent results from cook to cook

    So the better question isn’t just “which tastes better,” but what kind of flavor you prefer.

    • If you want bold, traditional BBQ flavor → charcoal and offset cooking
    • If you want milder, more controlled smoke → pellet grill

    Both can produce great results. One just leans heavier on smoke, while the other leans toward balance and consistency.

    If you’re still trying to decide which option is easier to manage starting out, check out my breakdown of pellet grill vs charcoal for beginners.

    Final Thoughts: Choosing Based on Taste and Experience

    When it comes to taste, both pellet grills and charcoal setups can produce great barbecue — they just take different paths to get there.

    Pellet grills offer a cleaner, more controlled smoke flavor that’s easy to manage and consistent from cook to cook. For beginners, that often means less frustration and more confidence early on.

    Charcoal and offset smoking take more effort, but they give you the ability to build a deeper, more traditional BBQ flavor once you learn how to manage the fire.

    If your goal is:

    • Simplicity and consistency → pellet grill
    • Stronger smoke flavor and hands-on control → charcoal and offset

    There’s no wrong choice — just a matter of what kind of experience you want and how involved you want to be in the process.

    And if you’re trying to weigh that decision alongside ease and cost, you can also check out my breakdown of pellet grill vs charcoal for beginners and what pellet vs charcoal really costs over five years to get a fuller picture.

  • Pellet Grill vs Charcoal: Which Is Easier for Beginners?

    Pellet Grill vs Charcoal: Which Is Easier for Beginners?

    If you’re getting into BBQ, one of the first questions you’ll run into is simple:

    Should I go with a pellet grill or stick with charcoal?

    On paper, pellet grills look easy. Set the temperature, walk away, and let the machine do the work. Charcoal, on the other hand, has a reputation for being more hands-on — more control, but also more effort.

    I’ve spent my time cooking on a traditional offset smoker — an Oklahoma Joe Longhorn reverse flow (around here, we call it The Beast). That means I’ve lived on the charcoal and wood side of things, dealing with fire management, airflow, and temperature swings.

    So if you’re a beginner trying to decide which route is easier, let’s break it down in real-world terms — not just what the manuals say, but what it actually feels like when you’re out there cooking.

    What Makes a Grill Easy for Beginners?

    Before choosing between pellet and charcoal, it helps to define what “easy” actually means when it comes to BBQ.

    For most beginners, ease comes down to a few key things:

    • Startup time – how quickly you can get cooking
    • Temperature control – how easy it is to hold a steady heat
    • Fire management – how much attention the grill needs
    • Learning curve – how long it takes to feel comfortable
    • Consistency – whether you get repeatable results

    Some people don’t mind tending a fire and learning the process. Others just want to put meat on, set a temperature, and not worry about it.

    Neither approach is wrong — but they are very different experiences.

    Understanding what matters most to you will make the decision a whole lot easier.

    Pellet Grills: The Easiest Entry Point?

    Pellet grills are often marketed as the easiest way to get into BBQ — and for a lot of beginners, that’s true.

    Most pellet grills work like an outdoor oven. You set your temperature, and the grill feeds wood pellets into a fire pot automatically to maintain that heat. A fan controls airflow, and the system does the work for you.

    From a beginner standpoint, that means:

    • Quick startup – turn it on and set your temp
    • Minimal fire management – no adjusting vents or adding fuel constantly
    • Stable temperatures – the grill handles fluctuations for you
    • Repeatable results – once you learn it, you can get consistent cooks

    If your goal is to keep things simple and avoid the frustration of managing a fire, pellet grills are about as close as it gets to “set it and forget it.”

    That said, the trade-off is control. You’re relying on the grill’s system rather than learning how fire behaves, and some people feel that takes away from the experience.

    But if ease is your top priority as a beginner, pellet grills are hard to beat.

    Charcoal Grills and Offset Smokers: A Steeper Learning Curve

    Charcoal grills and offset smokers are a different experience entirely.

    Instead of setting a temperature and letting the grill handle it, you are the system. You control the heat by managing fuel, airflow, and fire size — and that takes some practice.

    I cook on an Oklahoma Joe Longhorn reverse flow offset smoker — around here, it’s called The Beast. And I can tell you firsthand, charcoal and wood-fired cooking isn’t something you just turn on and walk away from.

    For beginners, that usually means:

    • Longer startup time – getting a clean, stable fire takes effort
    • Active fire management – adding charcoal or wood and adjusting airflow
    • Temperature swings – especially early on while you’re learning
    • Hands-on cooking – you’re checking and adjusting throughout the cook

    But there’s a flip side.

    Once you start to understand how your fire behaves — how airflow affects temperature, how fuel burns, how the smoker reacts — it starts to click. And when it does, you gain a level of control that pellet grills don’t really offer.

    For some people, that learning curve is frustrating. For others, it’s the whole point of BBQ.

    It’s not the easiest path for a beginner — but it’s one that teaches you the fundamentals quickly.

    Pellet vs Charcoal: Which Is Actually Easier for Beginners?

    If you’re looking strictly at ease, pellet grills are the clear winner for most beginners.

    They remove a lot of the variables that make BBQ challenging early on. You don’t have to manage a fire, adjust airflow, or constantly monitor temperatures. You set it, let it run, and focus on the food.

    Charcoal and offset cooking, on the other hand, requires more attention and patience. There’s a learning curve, and your first few cooks may not go exactly as planned while you figure things out.

    But “easier” doesn’t always mean “better,” depending on what you want out of BBQ.

    If your goal is:

    • Convenience and consistency → pellet grill is the easier choice
    • Learning fire control and traditional BBQ skills → charcoal is the better teacher

    A lot of beginners start with pellet grills to build confidence, then move into charcoal or offset cooking later once they want more control.

    Others jump straight into charcoal, accept the learning curve, and never look back.

    There’s no wrong choice — just a different path depending on how hands-on you want to be.

    My Take: Cooking at 250–275°F on an Offset Smoker

    For me, I’ve settled into cooking most things in the 250–275°F range on an offset smoker.

    That’s where I’ve found the balance.

    Running a little hotter than the traditional 225°F makes the cook more manageable. The fire stays cleaner, the smoker responds better, and you’re not chasing temperatures all day trying to keep things perfect.

    On The Beast — my Oklahoma Joe Longhorn reverse flow — that range also helps keep the cook steady without constantly fighting the fire. It still takes attention, but it’s a rhythm you can get into once you’ve spent some time with it.

    Is it as easy as a pellet grill? No.

    But it’s also not as intimidating as it seems once you understand what your smoker is doing. And when everything comes together — the fire, the airflow, the bark forming just right — it’s a different kind of satisfaction.

    For beginners, this is where charcoal and offset cooking starts to make sense. It’s not about perfection — it’s about learning how to manage the process.

    Final Thoughts: Pellet Grill vs Charcoal for Beginners

    If you’re just getting started and want the easiest path into BBQ, a pellet grill is hard to beat.

    It’s simple, consistent, and removes a lot of the early frustration that can come with learning how to manage a fire. For a lot of beginners, that’s exactly what they need to build confidence and start enjoying the process.

    But if you’re willing to put in a little more time and effort, charcoal — especially on an offset smoker — teaches you how BBQ really works. You’ll learn fire control, airflow, and how your smoker responds, and those skills carry over no matter what you cook on later.

    At the end of the day, the “easier” option depends on what you want:

    • If you want convenience and simplicity, go pellet
    • If you want hands-on cooking and traditional BBQ skills, go charcoal

    Either way, you’re still cooking barbecue — and that’s the part that really matters.

    If cost matters as much as ease, I also broke down what pellet vs charcoal really costs over five years.

    And if you end up running an offset smoker like The Beast, just know — it may not be the easiest way to start, but it’s one you won’t forget.

  • Pellet Smoker vs Charcoal: Which is Easier for Beginners?

    Pellet Smoker vs Charcoal: Which is Easier for Beginners?

    If you’re thinking about buying your first smoker, one of the first decisions you’ll run into is pellet vs charcoal. Both can produce great barbecue, but the experience of cooking on them is very different.

    For beginners, the biggest difference usually comes down to how much hands-on control you want versus how much automation you prefer. Understanding that difference can make choosing your first smoker much easier.

    How Pellet Smokers Work

    Pellet smokers run on compressed wood pellets that feed into a small fire pot automatically. A digital controller regulates the temperature by controlling how many pellets are delivered and how much air reaches the fire.

    For beginners, this means you can usually set a cooking temperature and let the smoker maintain it with minimal adjustment. The process feels similar to using an outdoor oven.

    Because the temperature control is automated, pellet smokers tend to have a shorter learning curve for new backyard cooks.

    How Charcoal Smokers Work

    Charcoal smokers rely on burning charcoal for heat and wood chunks for smoke flavor. Instead of an automatic controller, temperature is managed by adjusting airflow through the smoker’s vents.

    Opening vents allows more oxygen into the fire, which raises the temperature. Closing them restricts airflow and lowers the heat.

    Many experienced pitmasters enjoy this hands-on approach, but it usually requires more attention and practice compared to pellet smokers.

    Which One Is Easier for Beginners?

    For most beginners, pellet smokers are easier to learn. The automated temperature control removes much of the trial and error that comes with managing a charcoal fire.

    Instead of adjusting vents and monitoring fuel constantly, you can focus more on the food itself. That simplicity is why many first-time backyard cooks choose pellet smokers.

    Charcoal smokers can absolutely produce incredible barbecue, but they usually require more time to learn how airflow, fuel placement, and temperature control interact.

    When Charcoal Might Still Be the Better Choice

    Ease of use isn’t the only factor when choosing a smoker. Some beginners enjoy learning the hands-on process of managing a charcoal fire.

    Charcoal smokers are also mechanically simple and often cost less upfront. Many backyard cooks appreciate the control they get from adjusting airflow and fuel manually.

    If you enjoy experimenting and learning the craft of fire management, charcoal can still be a great place to start.

    Final Thoughts for First-Time Smokers

    For beginners, pellet smokers usually offer the easiest starting point because they simplify temperature control and reduce the learning curve. Charcoal smokers require more hands-on management but can be very rewarding for people who enjoy learning how fire behaves.

    Both types of smokers can produce excellent barbecue. The best choice often comes down to whether you want convenience or a more traditional fire-management experience.

    If you’re still deciding between the two, it helps to look at other factors like long-term cost and overall cooking style.

  • Pellet Smoker vs Charcoal: What It Really Costs Over 5 Years

    Pellet Smoker vs Charcoal: What It Really Costs Over 5 Years

    When people compare pellet smokers and charcoal smokers, they usually focus on flavor or convenience. But long-term cost is rarely discussed clearly.

    The upfront price is only part of the equation. Fuel costs, replacement parts, and maintenance add up over time. If you’re trying to decide which smoker makes more financial sense, it helps to look beyond the sticker price.

    And if you’re trying to decide which option is easier to actually live with as a beginner, check out my breakdown of pellet grill vs charcoal for beginners.

    Upfront Purchase Cost

    Pellet smokers typically cost more upfront. Entry-level models often start higher than basic charcoal smokers, especially when you factor in digital controllers and electronic components.

    Charcoal smokers, particularly kettle-style or barrel-style models, can be significantly less expensive to get started.

    However, price ranges vary widely in both categories. A premium charcoal setup can cost as much as — or more than — a mid-range pellet smoker. The real difference shows up over time, not just on day one.

    Fuel Costs Over Time

    Fuel is where long-term costs begin to separate more clearly. Pellet smokers rely on compressed wood pellets, while charcoal smokers use lump charcoal or briquettes — often supplemented with wood chunks for smoke flavor.

    Pellet consumption depends on temperature and weather, but steady low-and-slow cooks burn consistently for hours at a time. Charcoal usage varies more depending on fire management and airflow.

    If you’re leaning toward charcoal, the type you choose can affect burn consistency, ash buildup, and how much fuel you use—here’s what I’ve found works best as the best charcoal for an offset smoker.

    Over five years of regular cooking, fuel becomes a recurring expense. The difference may not be dramatic for occasional backyard cooks, but frequent smokers will notice it adding up.

    Estimating 5-Year Fuel Costs

    Let’s assume someone smokes twice a month — roughly 24 cooks per year. Over five years, that’s about 120 cooks.

    Pellet smokers might use several pounds of pellets per cook depending on temperature and duration. Charcoal smokers may use a chimney or more per session, plus occasional wood chunks.

    Depending on local pricing and cooking style, total five-year fuel costs can end up in a similar range — often a few hundred dollars apart rather than thousands.

    For most backyard cooks, fuel cost differences matter less than consistency, convenience, and personal preference.

    Maintenance and Replacement Parts

    Long-term cost isn’t just about fuel. Maintenance and replacement parts can change the equation.

    Pellet smokers contain electronic components — controllers, augers, fans, and igniters. Over several years, some of these parts may need replacement depending on usage and build quality.

    Charcoal smokers are mechanically simpler. Aside from grates, gaskets, or occasional hardware replacements, there are fewer components that can fail.

    That simplicity can mean lower long-term repair costs — but it also means less automation and temperature control.

    So Which One Is More Affordable?

    Over five years, the total cost difference between pellet and charcoal smokers is often smaller than people expect. Pellet smokers typically cost more upfront and may carry slightly higher long-term maintenance risk. Charcoal smokers cost less to start and are mechanically simpler.

    But fuel costs over time are usually closer than the debate suggests. For many backyard cooks, the real decision comes down to convenience versus hands-on fire management — not dollars alone.

    If you’re weighing more than just cost, it helps to look at flavor, ease of use, and overall cooking style as well.

  • Why Your Smoker Temperature Swings (And How to Stabilize It)

    Why Your Smoker Temperature Swings (And How to Stabilize It)

    If your smoker temperature climbs 30 degrees, drops 20, then spikes again, you’re not alone. Temperature swings are one of the most common frustrations in backyard BBQ.

    The good news? Most swings aren’t caused by bad equipment. They’re caused by airflow, fuel management, and how heat actually moves inside your smoker. Once you understand those three things, stabilizing your temperature gets much easier.

    Airflow Controls Everything

    Temperature in a smoker isn’t controlled by the fuel alone — it’s controlled by oxygen. More oxygen feeds the fire and increases heat. Less oxygen slows combustion and lowers temperature.

    Small vent adjustments can create larger temperature changes than most people expect. Opening vents too quickly or too far often causes overshooting. Closing them abruptly can choke the fire and create a sudden drop.

    Stable temperature usually comes from small, gradual adjustments — not big corrections.

    Fuel Management Can Create Swings

    In charcoal smokers especially, how you add fuel makes a huge difference. Dumping a full chimney of lit coals into an already running fire almost guarantees a temperature spike.

    On the other hand, waiting too long to add fuel can cause a slow decline that’s hard to recover from without overcorrecting.

    The key is consistency. Adding smaller amounts of fuel before temperatures crash keeps the fire steady instead of reactive. Pellet smokers aren’t immune either — sudden feed cycles can create short-term spikes if the smoker is fighting wind or cold weather.

    Wind and Weather Change Everything

    Even a steady smoker can behave differently depending on conditions outside. Wind increases airflow through vents and can push temperatures higher than expected. Cold weather pulls heat away from the smoker body, making it work harder to maintain temperature.

    Direct sunlight can raise metal surface temperatures, while sudden gusts can create unexpected spikes.

    Many temperature swings aren’t mechanical problems — they’re environmental reactions.

    How to Stabilize Your Smoker Temperature

    Stabilizing your smoker isn’t about chasing every small fluctuation. It’s about preventing big swings before they happen.

    Make vent adjustments slowly and give them time to work before changing them again. Add smaller amounts of fuel consistently instead of waiting for large drops. Shield your smoker from strong wind if possible.

    Most importantly, measure temperature at grate level so you’re reacting to the number that actually matters. Relying only on the lid gauge can make swings look worse than they really are.

    Small Swings are Normal

    Every smoker moves. A perfectly flat temperature line isn’t realistic, especially with charcoal. Small swings of 10–20 degrees are completely normal and won’t ruin your cook.

    What matters most is avoiding dramatic spikes and crashes. When you understand airflow, fuel timing, and environmental impact, temperature control becomes predictable instead of stressful.

  • Why Your Smoker Temperature Doesn’t Match the Lid Gauge

    Why Your Smoker Temperature Doesn’t Match the Lid Gauge

    If you’ve ever looked at your smoker lid gauge and then checked your probe thermometer only to see a 20–50 degree difference, you’re not crazy. It happens all the time.

    The problem isn’t usually your meat, your fuel, or even your technique. It’s understanding where temperature is actually being measured — and why those numbers rarely match perfectly.

    Where the Lid Gauge Is Actually Measuring

    Most built-in lid gauges sit high on the dome of the smoker. That means they’re measuring the air temperature near the top — not the temperature where your food is sitting.

    Heat rises. So the top of the smoker is often hotter than grate level. On some setups, especially charcoal smokers, the difference can be 20–40 degrees or more.

    That doesn’t mean the lid gauge is broken. It just means it’s measuring a different zone.

    Why the Temperature Difference Can Be So Big

    Several things make the gap between lid temperature and grate temperature even wider.

    Airflow: Vents, wind, and how your smoker drafts can create hot spots and cool zones.

    Fuel placement: In charcoal smokers especially, heat radiates unevenly depending on where the coals are sitting.

    Water pans and drip trays: These absorb heat and can lower grate-level temperatures while the dome stays hotter.

    When you combine those factors, it’s easy to see why your lid might say 275°F while your probe at grate level reads 235°F.

    Which Temperature Should You Trust?

    If your goal is consistent results, the temperature at grate level matters more than the number on the lid. That’s where your food is actually cooking.

    Lid gauges are useful for trends — they tell you whether the smoker is climbing or dropping overall. But for accuracy, especially on longer cooks, grate-level readings are far more reliable.

    That’s why using a probe thermometer at food level makes such a difference during real cooks.

    What To Do About the Difference

    The fix isn’t replacing your lid gauge — it’s understanding how to use it.

    If you want the most accurate reading, place a probe thermometer at grate level, near the food. That gives you the number that actually matters.

    Over time, you’ll learn how your smoker behaves. You might notice that when the lid reads 275°F, your grate level sits closer to 240°F. Once you know that pattern, you can adjust confidently without second-guessing every fluctuation.

    Temperature swings are normal. Knowing where you’re measuring is what keeps you in control.