Author: DJ Jones

  • Pellet Smoker vs Charcoal: What It Really Costs Over 5 Years

    Pellet Smoker vs Charcoal: What It Really Costs Over 5 Years

    When people compare pellet smokers and charcoal smokers, they usually focus on flavor or convenience. But long-term cost is rarely discussed clearly.

    The upfront price is only part of the equation. Fuel costs, replacement parts, and maintenance add up over time. If you’re trying to decide which smoker makes more financial sense, it helps to look beyond the sticker price.

    Upfront Purchase Cost

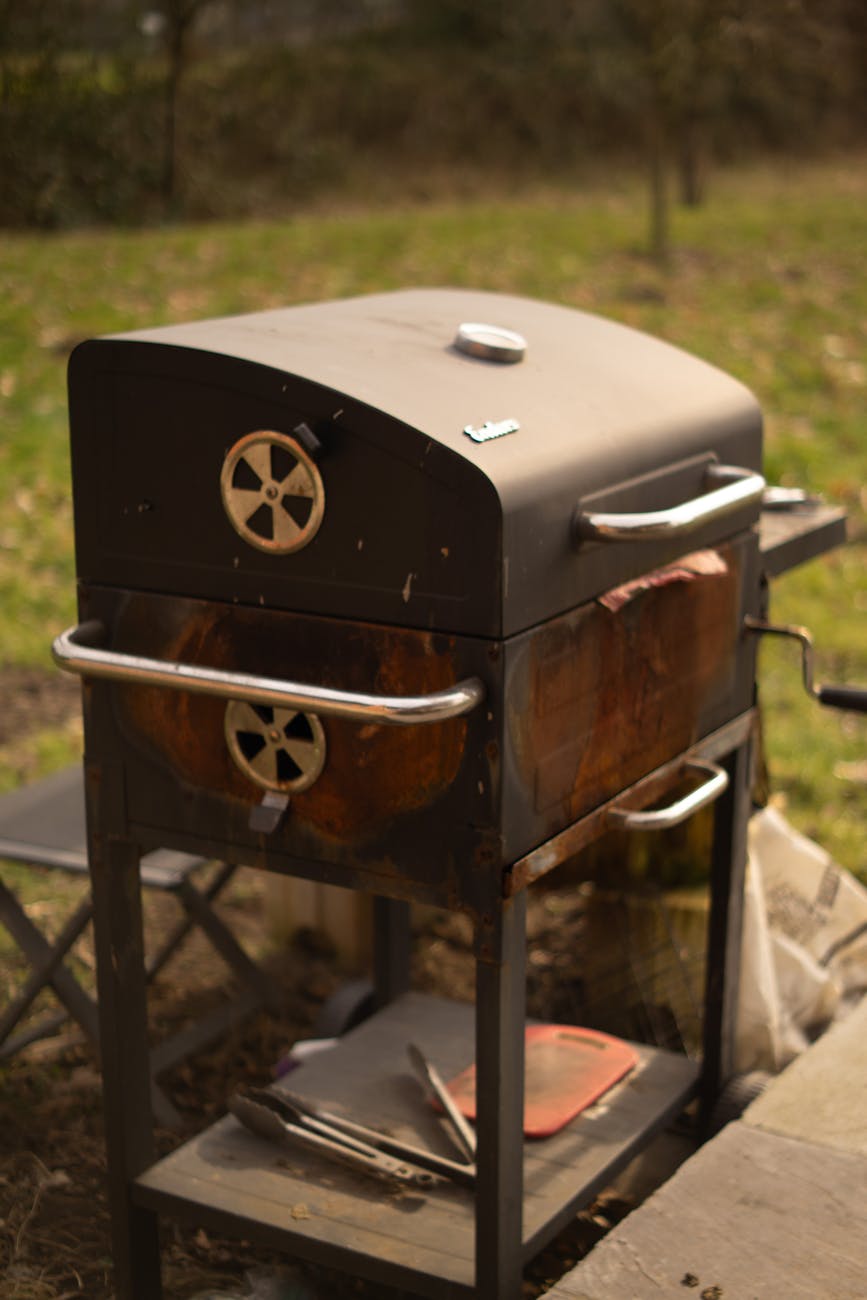
    Pellet smokers typically cost more upfront. Entry-level models often start higher than basic charcoal smokers, especially when you factor in digital controllers and electronic components.

    Charcoal smokers, particularly kettle-style or barrel-style models, can be significantly less expensive to get started.

    However, price ranges vary widely in both categories. A premium charcoal setup can cost as much as — or more than — a mid-range pellet smoker. The real difference shows up over time, not just on day one.

    Fuel Costs Over Time

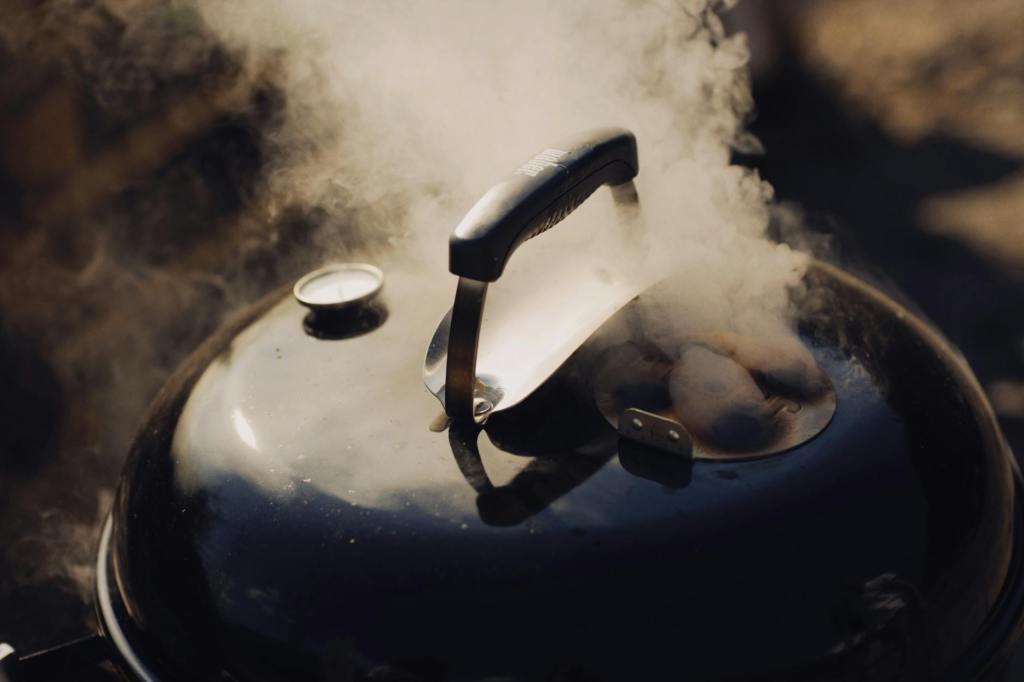
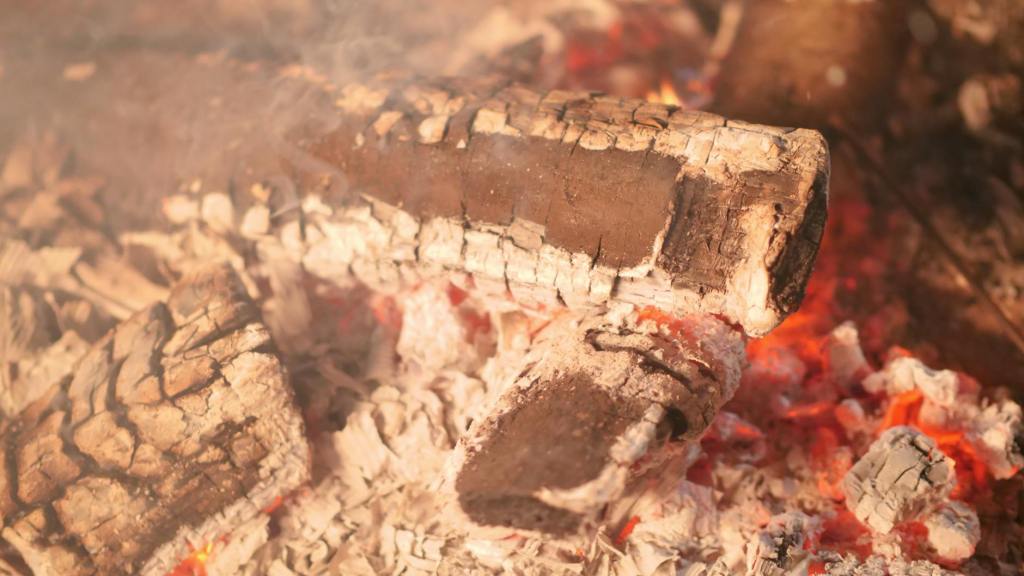
    Fuel is where long-term costs begin to separate more clearly. Pellet smokers rely on compressed wood pellets, while charcoal smokers use lump charcoal or briquettes — often supplemented with wood chunks for smoke flavor.

    Pellet consumption depends on temperature and weather, but steady low-and-slow cooks burn consistently for hours at a time. Charcoal usage varies more depending on fire management and airflow.

    Over five years of regular cooking, fuel becomes a recurring expense. The difference may not be dramatic for occasional backyard cooks, but frequent smokers will notice it adding up.

    Estimating 5-Year Fuel Costs

    Let’s assume someone smokes twice a month — roughly 24 cooks per year. Over five years, that’s about 120 cooks.

    Pellet smokers might use several pounds of pellets per cook depending on temperature and duration. Charcoal smokers may use a chimney or more per session, plus occasional wood chunks.

    Depending on local pricing and cooking style, total five-year fuel costs can end up in a similar range — often a few hundred dollars apart rather than thousands.

    For most backyard cooks, fuel cost differences matter less than consistency, convenience, and personal preference.

    Maintenance and Replacement Parts

    Long-term cost isn’t just about fuel. Maintenance and replacement parts can change the equation.

    Pellet smokers contain electronic components — controllers, augers, fans, and igniters. Over several years, some of these parts may need replacement depending on usage and build quality.

    Charcoal smokers are mechanically simpler. Aside from grates, gaskets, or occasional hardware replacements, there are fewer components that can fail.

    That simplicity can mean lower long-term repair costs — but it also means less automation and temperature control.

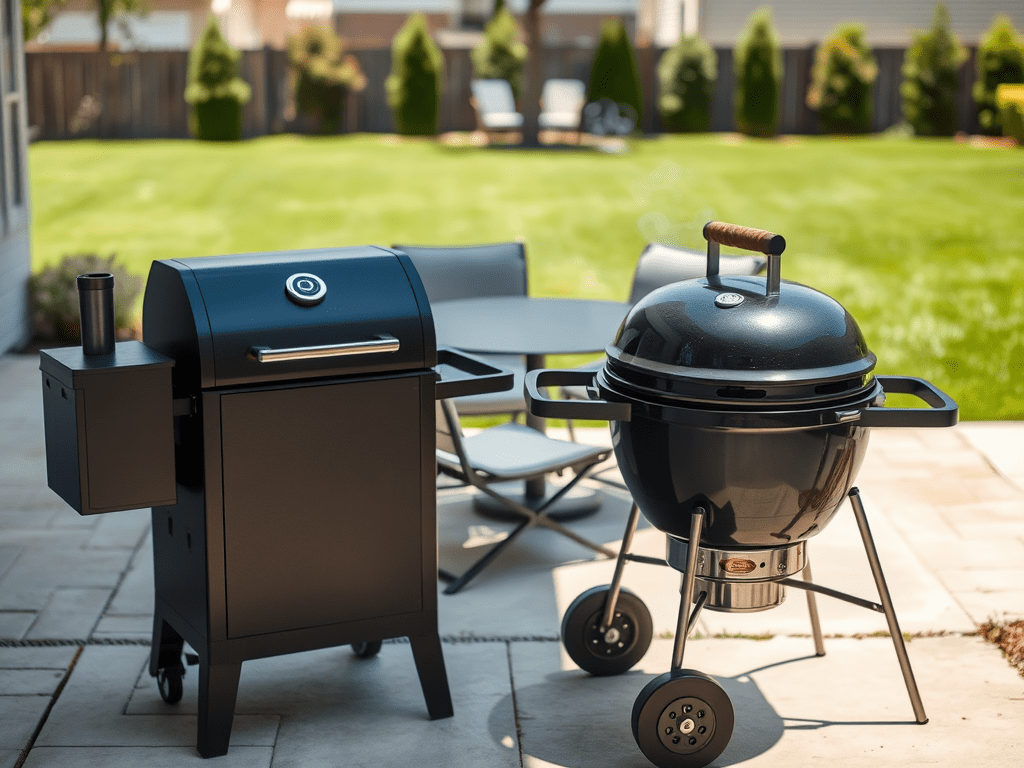
    So Which One Is More Affordable?

    Over five years, the total cost difference between pellet and charcoal smokers is often smaller than people expect. Pellet smokers typically cost more upfront and may carry slightly higher long-term maintenance risk. Charcoal smokers cost less to start and are mechanically simpler.

    But fuel costs over time are usually closer than the debate suggests. For many backyard cooks, the real decision comes down to convenience versus hands-on fire management — not dollars alone.

    If you’re weighing more than just cost, it helps to look at flavor, ease of use, and overall cooking style as well.

  • Why Your Smoker Temperature Swings (And How to Stabilize It)

    Why Your Smoker Temperature Swings (And How to Stabilize It)

    If your smoker temperature climbs 30 degrees, drops 20, then spikes again, you’re not alone. Temperature swings are one of the most common frustrations in backyard BBQ.

    The good news? Most swings aren’t caused by bad equipment. They’re caused by airflow, fuel management, and how heat actually moves inside your smoker. Once you understand those three things, stabilizing your temperature gets much easier.

    Airflow Controls Everything

    Temperature in a smoker isn’t controlled by the fuel alone — it’s controlled by oxygen. More oxygen feeds the fire and increases heat. Less oxygen slows combustion and lowers temperature.

    Small vent adjustments can create larger temperature changes than most people expect. Opening vents too quickly or too far often causes overshooting. Closing them abruptly can choke the fire and create a sudden drop.

    Stable temperature usually comes from small, gradual adjustments — not big corrections.

    Fuel Management Can Create Swings

    In charcoal smokers especially, how you add fuel makes a huge difference. Dumping a full chimney of lit coals into an already running fire almost guarantees a temperature spike.

    On the other hand, waiting too long to add fuel can cause a slow decline that’s hard to recover from without overcorrecting.

    The key is consistency. Adding smaller amounts of fuel before temperatures crash keeps the fire steady instead of reactive. Pellet smokers aren’t immune either — sudden feed cycles can create short-term spikes if the smoker is fighting wind or cold weather.

    Wind and Weather Change Everything

    Even a steady smoker can behave differently depending on conditions outside. Wind increases airflow through vents and can push temperatures higher than expected. Cold weather pulls heat away from the smoker body, making it work harder to maintain temperature.

    Direct sunlight can raise metal surface temperatures, while sudden gusts can create unexpected spikes.

    Many temperature swings aren’t mechanical problems — they’re environmental reactions.

    How to Stabilize Your Smoker Temperature

    Stabilizing your smoker isn’t about chasing every small fluctuation. It’s about preventing big swings before they happen.

    Make vent adjustments slowly and give them time to work before changing them again. Add smaller amounts of fuel consistently instead of waiting for large drops. Shield your smoker from strong wind if possible.

    Most importantly, measure temperature at grate level so you’re reacting to the number that actually matters. Relying only on the lid gauge can make swings look worse than they really are.

    Small Swings are Normal

    Every smoker moves. A perfectly flat temperature line isn’t realistic, especially with charcoal. Small swings of 10–20 degrees are completely normal and won’t ruin your cook.

    What matters most is avoiding dramatic spikes and crashes. When you understand airflow, fuel timing, and environmental impact, temperature control becomes predictable instead of stressful.

  • Why Your Smoker Temperature Doesn’t Match the Lid Gauge

    Why Your Smoker Temperature Doesn’t Match the Lid Gauge

    If you’ve ever looked at your smoker lid gauge and then checked your probe thermometer only to see a 20–50 degree difference, you’re not crazy. It happens all the time.

    The problem isn’t usually your meat, your fuel, or even your technique. It’s understanding where temperature is actually being measured — and why those numbers rarely match perfectly.

    Where the Lid Gauge Is Actually Measuring

    Most built-in lid gauges sit high on the dome of the smoker. That means they’re measuring the air temperature near the top — not the temperature where your food is sitting.

    Heat rises. So the top of the smoker is often hotter than grate level. On some setups, especially charcoal smokers, the difference can be 20–40 degrees or more.

    That doesn’t mean the lid gauge is broken. It just means it’s measuring a different zone.

    Why the Temperature Difference Can Be So Big

    Several things make the gap between lid temperature and grate temperature even wider.

    Airflow: Vents, wind, and how your smoker drafts can create hot spots and cool zones.

    Fuel placement: In charcoal smokers especially, heat radiates unevenly depending on where the coals are sitting.

    Water pans and drip trays: These absorb heat and can lower grate-level temperatures while the dome stays hotter.

    When you combine those factors, it’s easy to see why your lid might say 275°F while your probe at grate level reads 235°F.

    Which Temperature Should You Trust?

    If your goal is consistent results, the temperature at grate level matters more than the number on the lid. That’s where your food is actually cooking.

    Lid gauges are useful for trends — they tell you whether the smoker is climbing or dropping overall. But for accuracy, especially on longer cooks, grate-level readings are far more reliable.

    That’s why using a probe thermometer at food level makes such a difference during real cooks.

    What To Do About the Difference

    The fix isn’t replacing your lid gauge — it’s understanding how to use it.

    If you want the most accurate reading, place a probe thermometer at grate level, near the food. That gives you the number that actually matters.

    Over time, you’ll learn how your smoker behaves. You might notice that when the lid reads 275°F, your grate level sits closer to 240°F. Once you know that pattern, you can adjust confidently without second-guessing every fluctuation.

    Temperature swings are normal. Knowing where you’re measuring is what keeps you in control.

  • Target Temps for Chicken, Pork, and Brisket (No Guessing, No Panic)

    Target Temps for Chicken, Pork, and Brisket (No Guessing, No Panic)

    One of the fastest ways to ruin good meat is second-guessing temperature. Not because you don’t care—but because every chart online says something different. These are the target temps I actually use for chicken, pork, and brisket, and when I stop stressing and start trusting the numbers.

    Chicken Target Temps (Dark vs White Meat)

    Chicken is where most people get burned by guessing. White meat dries out fast, while dark meat actually gets better when you take it higher. That’s why lumping all chicken together leads to disappointment.

    For breasts, I’m looking for 160–165°F at the thickest part, then letting carryover heat finish the job. For thighs and drums, I don’t even think about pulling until they’re 175–185°F—that’s when the fat renders and the meat relaxes instead of tightening up.

    This is also where “close enough” stops working. Five degrees too early or too late makes a noticeable difference with chicken.

    Pork Target Temps (Chops vs Butt)

    Pork gets confusing because “pork” can mean two totally different cooks. Chops are lean and unforgiving. Pork butt is the opposite—it needs time and heat to break down.

    For pork chops, I pull them at 140–145°F and let them rest. Any higher and you’re squeezing moisture out for no reason. With pork butt, I don’t even start checking until it’s in the 195–203°F range, and even then I care more about feel than the number. My magic number has always been 203!

    If you’ve ever pulled a butt early because it “felt done,” you already know how badly guessing can backfire.

    Brisket Target Temps (Where People Freak Out)

    Brisket is where temperature anxiety really sets in. The stall hits, the cook slows down, and suddenly every decision feels urgent. This is also where obsessing over time does the most damage.

    I’m usually pulling brisket somewhere between 195–203°F, but the number alone doesn’t decide it. What I’m really checking for is feel—when the probe slides in with little to no resistance, especially in the flat.

    If the brisket isn’t probe-tender, it’s not done. And if it is, the exact number matters a lot less than people think.

    Why Temperature Is More Reliable Than Time

    Cook times sound comforting, but they lie. Weather changes, meat size varies, and every smoker runs a little different. That’s why relying on time alone creates panic halfway through a cook.

    Quick Target Temp Reference

    • Chicken breast: 160–165°F
    • Chicken thighs/drums: 175–185°F
    • Pork chops: 140–145°F
    • Pork butt (shoulder): 195–203°F
    • Brisket: 195–203°F

    Once you stop chasing time and start trusting temperature, cooking gets calmer and the results get better. Everything else is just noise.

  • Pellet vs Charcoal/Wood (Stick Burner) Smoker: What I’d Choose (and Why)

    Pellet vs Charcoal/Wood (Stick Burner) Smoker: What I’d Choose (and Why)

    Pellet smokers are popular for a reason—they’re easy. But if you’re asking what I’d choose all day long, it’s charcoal/wood (a stick burner). To me, pellet smokers take out the cooking element. A stick burner takes technique, attention, and patience—and the payoff is better smoke flavor and a cook that actually feels earned. Here’s my honest breakdown of pellet vs charcoal/wood, and why the stick burner wins in my backyard.

    Quick answer

    If you want set-it-and-forget-it convenience, get a pellet smoker.
    If you want stronger smoke flavor and real technique, go charcoal/wood (stick burner).

    Why I choose charcoal/wood (stick burner) every time

    • It keeps the cooking in BBQ (you’re managing fire, not pushing buttons)
    • More smoke flavor when you run it right
    • Better bark and texture on long cooks
    • It’s a skill—and it gets better every time you cook
    • It’s just more fun (and more satisfying)

    When a pellet smoker actually makes sense

    Pellet smokers are the right tool when you want BBQ results with less babysitting.

    • You want easy temperature control
    • You cook on weeknights and don’t have time to manage a fire
    • You want consistent results without a learning curve
    • You’re cooking for a crowd and need it to be predictable

    Smoke flavor: pellet vs stick burner

    This is the biggest difference to me. Pellet smoke can be good, but it’s usually lighter and cleaner. A charcoal/wood fire gives you deeper smoke flavor and that “real BBQ” profile—especially on brisket and pork butt. If smoke flavor is the whole reason you bought a smoker in the first place, a stick burner delivers it in a way pellets usually don’t.

    Pellet vs charcoal/wood: quick comparison

    • Ease of use: Pellet ✅✅✅ | Stick burner ✅
    • Smoke flavor: Pellet ✅✅ | Stick burner ✅✅✅
    • Temperature control: Pellet ✅✅✅ | Stick burner ✅✅
    • Learning curve: Pellet ✅ | Stick burner ✅✅✅
    • Fun / satisfaction: Pellet ✅✅ | Stick burner ✅✅✅

    Final take

    Pellet smokers are convenient and they absolutely have a place. But if you want BBQ that feels like you cooked it, and you care about deeper smoke flavor, charcoal/wood wins. A stick burner takes technique and attention—but once you learn it, nothing else hits the same.

  • How to Smoke Wings Without Rubbery Skin

    How to Smoke Wings Without Rubbery Skin

    Recommended Gear

    Disclosure: This post contains affiliate links (at no extra cost to you).

    Smoked wings are easy to cook… and easy to mess up. The flavor is usually great, but the skin comes out rubbery if you don’t do a few key things right. This is my simple, repeatable method for wings that taste smoked and bite clean.

    The quick fix (if your wing skin is rubbery)

    • Cook hotter than you think: 300°F–375°F
    • Dry the wings before seasoning
    • Use baking powder (NOT baking soda) in your rub for crispier skin
    • Finish with 10–15 minutes high heat (or a quick broil/grill finish)

    My simple smoked wing method (crispy skin, real smoke flavor)

    1. Dry the wings with paper towels (this matters).
    2. Season with your rub. For crispier skin, mix 1 tablespoon baking powder per 1 pound of wings into the rub.
    3. Smoke at 325°F for 45–60 minutes, flipping once if you want.
    4. When they hit 175°F–185°F, crank heat to 375°F for 10–15 minutes to tighten the skin. “If you’re shopping for a thermometer, I broke down what I’d buy (and what I’d skip) here.”
    5. Rest 5 minutes, then sauce (or don’t).

    Common wing mistakes (and the fix)

    • Cooking too low (225°F) → great smoke, rubber skin. Go 300°F+
    • Putting wings on wet → dry them first
    • Saucing too early → sauce at the end
    • Pulling at 165°F → wings are better at 175–185°F
    • Crowding the grate → give them space so they roast, not steam

    Quick FAQ

    Do I have to use baking powder?
    No. It just helps the skin crisp up. If you skip it, you’ll want a hotter finish.

    Can I sauce them and still keep the skin decent?
    Yes—just sauce at the end and keep the heat up for a few minutes to set it.

    What internal temp should wings be?
    Wings are safest at 165°F, but they eat better around 175–185°F.

    Final take

    Smoked wings don’t need to be complicated. Dry them, cook them hot, and finish with high heat. Do that and you’ll get wings that taste like smoke without chewing through rubber skin.

  • Best Wireless Meat Thermometer for Smoking

    Best Wireless Meat Thermometer for Smoking

    Disclosure: This post contains affiliate links (at no extra cost to you).

    I’ve used the same wireless meat thermometer for years, and it taught me what matters and what doesn’t. When you’re smoking brisket or pork butt for hours, a thermometer isn’t a luxury-it’s the difference between confidence and chaos. This guide covers the best wireless meat themometers for smoking in 2026, including the one I’ve personally used long-term, plus the upgrade picks I’d buy next based on real-world BBQ needs.

    1. Best wireless meat thermometers for smoking (2026)
      1. Best overall (most people)
      2. Best value (good balance)
      3. Best premium “all-in-one” upgrade
    2. How to use a wireless thermometer on long cooks (my simple method)
    3. Quick FAQ
    4. Final take

    Quick Picks (2026):

    If you only care about what actually works on a smoker, these are the wireless thermometers worth considering right now.

    All of these options solve the same core problem—accurate temps without hovering over the smoker. The differences come down to range, app experience, and how hands-off you want the cook to be.

    What matters most in a wireless meat thermometer for smoking

    • Reliable connection (your signal shouldn’t die every time you step inside)
    • Accurate temps (especially 150F – 205F range)
    • Good probe durability (heat and grease are unforgiving)
    • Easy app + alerts (target temps + high/low alarms)
    • Battery life (long cooks = long days)
    • Range that matches your life (backyard, garage, inside the house)

    My long-term wireless thermometer (what I’ve used since 2020)

    The wireless meat thermometer I’ve used the longest is a Chugod model I bought on Amazon back in 2020. It’s one of those “off-brand but it works” purchases—and it’s been reliable enough that I’ve never felt the need to replace it mid-season. The only downside is that Chugod doesn’t seem to be a major active brand anymore, which is a real issue with a lot of Amazon thermometers: they can work great for years, then disappear overnight.

    Note: I’m not recommending this exact Chugod model today because it doesn’t seem consistently available anymore—but the lessons from using it long-term still apply.

    What I learned from using it long-term: the best thermometers aren’t just accurate—they’re the ones with a stable connection, durable probes, and an app/receiver setup that doesn’t drive you crazy during a long cook.

    If your thermometer brand disappears, here’s what matters when you replace it

    If you’re replacing an older model (or an off-brand that’s no longer sold), focus on these upgrades:

    • Signal stability over “crazy range claims”
    • Probe quality (this is what usually fails first)
    • Simple alarms for target temp + high/low temp
    • A company that will still exist in 3 years

    Best wireless meat thermometers for smoking (2026)

    Best overall (most people)

    Best value (good balance)

    Best premium “all-in-one” upgrade

    How to use a wireless thermometer on long cooks (my simple method)

    1. Insert the probe into the thickest part of the meat (avoid touching bone).
    2. Set a target temp alarm (example: 195–203°F for pulled pork, depending on tenderness).
    3. Set a high/low smoker temp alert if your unit supports it (this saves cooks).
    4. Don’t chase the number every 5 minutes — let the smoker do its job.
    5. When you hit your target range, confirm tenderness, then rest the meat before slicing/pulling.

    Quick FAQ

    Do I need WiFi or is Bluetooth enough?
    Bluetooth is fine if you stay close. If you want to walk inside, do chores, or watch TV without losing signal, WiFi (or a dedicated remote receiver) is worth it.

    How many probes should I get?
    For most backyard smoking: 2 probes is the sweet spot (one for meat, one for smoker temp). If you cook for groups, 4 probes is nice.

    What usually breaks first?
    Almost always the probes. Heat + grease eventually win, so buy a model where replacement probes are easy to find.

    “If you’re unsure what numbers you should actually be aiming for, I broke down the target cooking temps for chicken, pork, and brisket here.”

    Final take

    A wireless meat thermometer is one of the few BBQ tools that actually makes you a better cook overnight. I ran an off-brand Amazon unit for years (Chugod) and it got the job done—but if I were buying today, I’d prioritize reliability, probe quality, and a brand that’s going to still be around next season.

    If you want the safest “buy it once” pick, go with a proven brand. If you want the best value, get a solid multi-probe setup. Either way: stop guessing temps and start trusting the cook.

    Affiliate note: Some links on this site may be affiliate links, meaning I may earn a small commission if you purchase—at no extra cost to you.